
Drinks and Beverages
Pineapple Coconut Smoothie Recipe: Creamy And Delicious

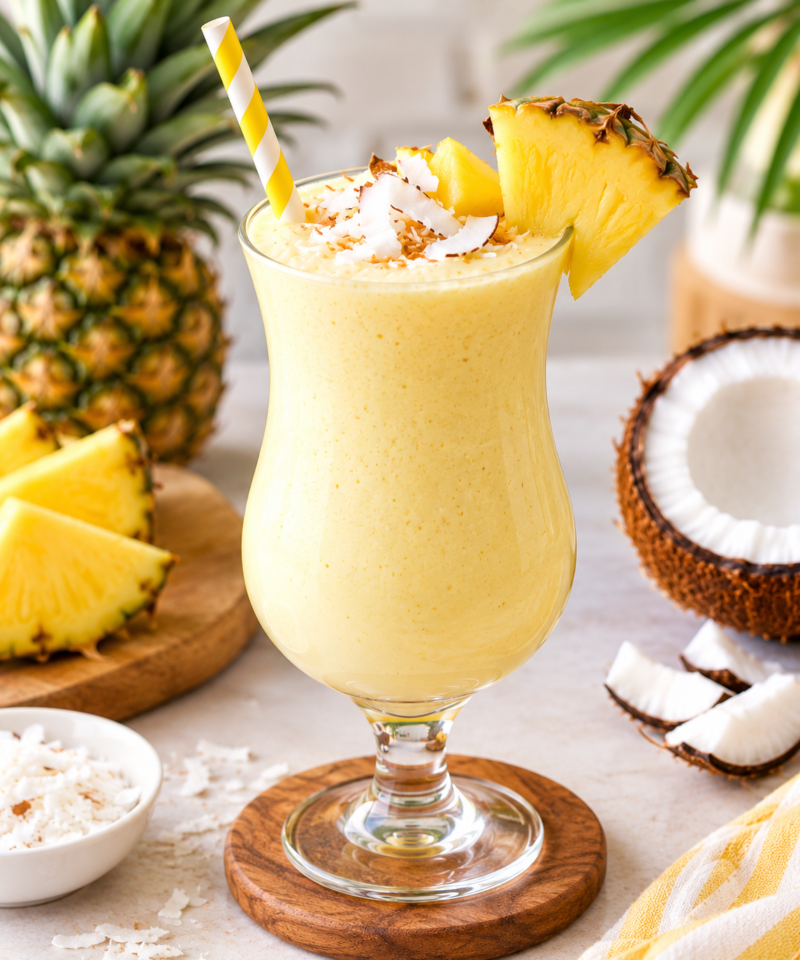
Pineapple Coconut Smoothie
A pineapple coconut smoothie is one of those easy recipes that can make an ordinary morning feel a little more special. Sweet pineapple, creamy coconut milk, and yogurt come together in a smooth, refreshing drink with a naturally tropical flavor. It is quick enough for breakfast and light enough for an afternoon snack.
It’s easy to modify this smoothie based on what you have in the kitchen. Fresh pineapple gives you a bright, juicy flavor, while frozen pineapple makes the drink thicker and colder. You can use Greek yogurt for extra protein, coconut yogurt for a dairy-free option, or add a little honey or maple syrup if your fruit needs more sweetness.
Why You’ll Love This Pineapple Coconut Smoothie
There are plenty of reasons to keep this smoothie in your regular breakfast rotation:
- Quick to make: Everything goes into the blender, so there is very little prep.
- Creamy texture: Yogurt and coconut milk create a rich, smooth consistency.
- Naturally tropical: Pineapple and coconut make a classic flavor combination.
- Easy to customize: Fresh or frozen pineapple both work well.
- No complicated ingredients: Most of the ingredients are easy to find.
- Great for different occasions: Enjoy it for breakfast, a snack, or a light dessert.
- Easy to make dairy-free: Simply use plant-based yogurt.
Pineapple Coconut Smoothie Ingredients
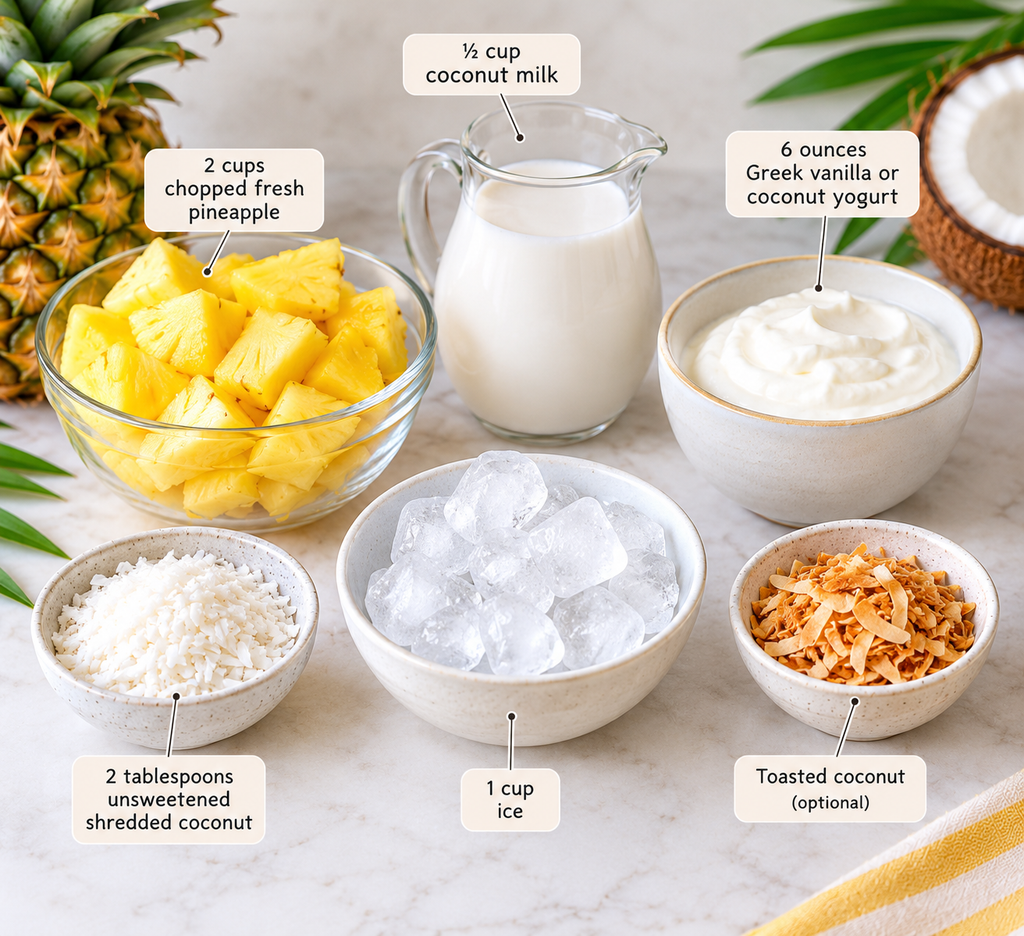
To make this cool beverage, you only need a few ingredients.
- 2 cups chopped fresh pineapple
Use ripe pineapple for the sweetest flavor. Frozen pineapple also works. - ½ cup coconut milk
Canned coconut milk gives the smoothie a creamy texture and noticeable coconut flavor. - 6 ounces Greek vanilla or coconut yogurt
Greek yogurt adds creaminess and protein. Coconut yogurt works well for a dairy-free version. - 2 tablespoons unsweetened shredded coconut
This gives it a somewhat textured finish and more coconut taste. - 1 cup ice
Use ice when working with fresh pineapple. Use in very limited quantity if pineapple is frozen. - Toasted coconut, optional
Sprinkle it over the finished smoothie for a simple garnish.
Equipment Needed for This Pineapple Coconut Smoothie
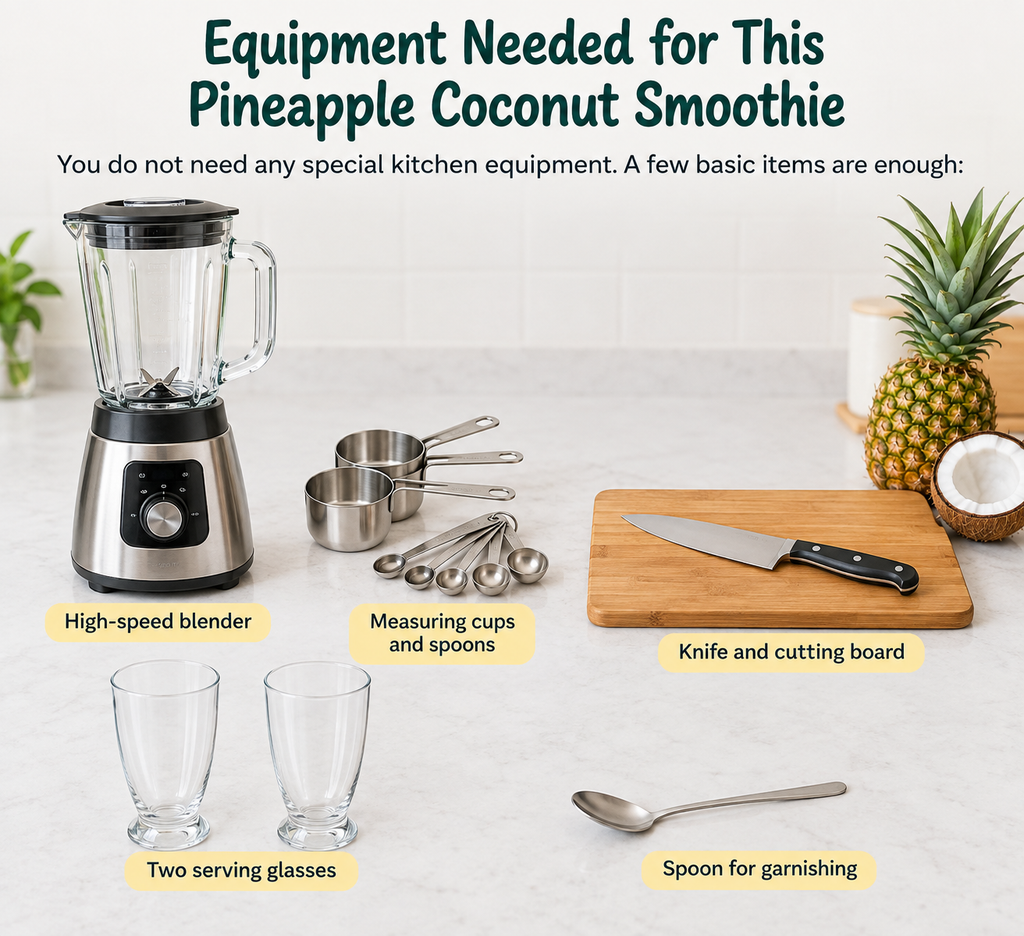
You do not need any special kitchen equipment. A few basic items are enough:
- High-speed blender
- Measuring cups and spoons
- Knife and cutting board
- Two serving glasses
- Spoon for garnishing
How to Make Pineapple Coconut Smoothie
Making this smoothie takes only a few simple steps.
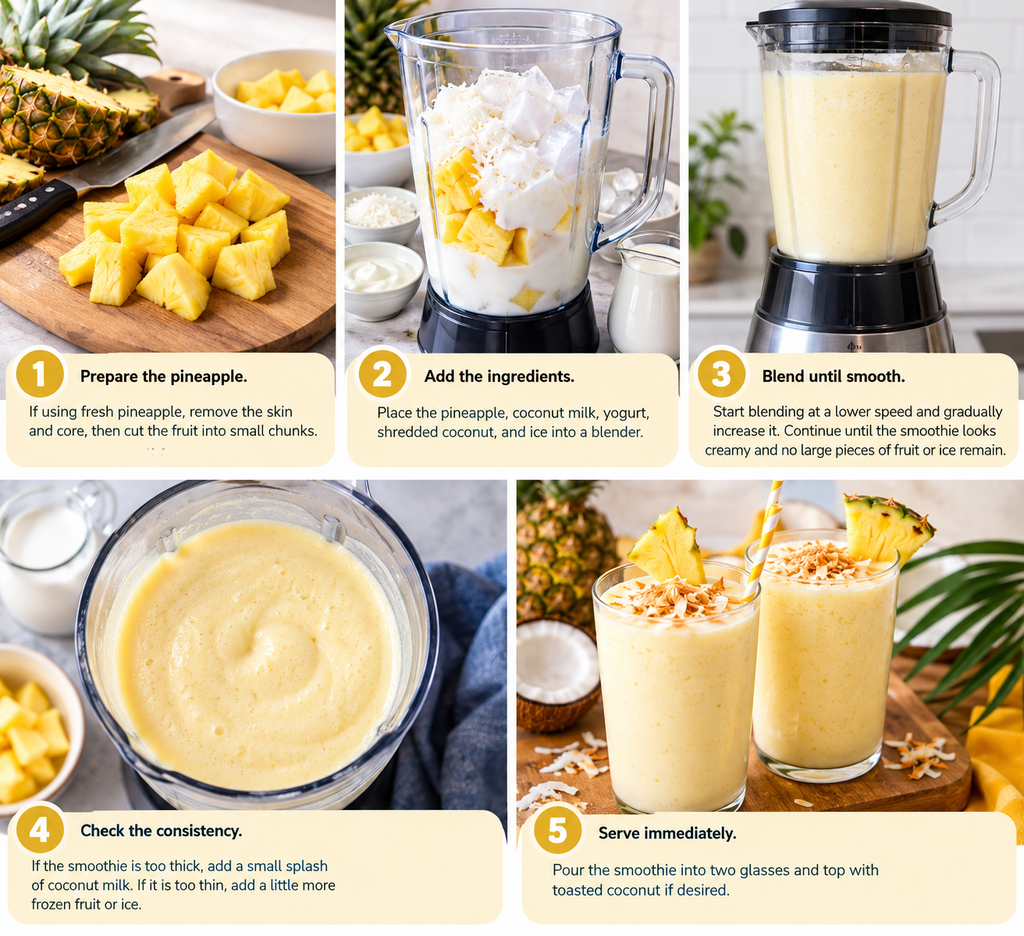
- Prepare the pineapple.
If using fresh pineapple, remove the skin and core, then cut the fruit into small chunks. - Add the ingredients.
Place the pineapple, coconut milk, yogurt, shredded coconut, and ice into a blender. - Blend until smooth.
Start blending at a lower speed and gradually increase it. Continue until the smoothie looks creamy and no large pieces of fruit or ice remain. - Check the consistency.
Add a tiny bit of coconut milk if the smoothie is too thick. If the mixture is too thin, add some more frozen fruit or ice. - Serve immediately.
Pour the smoothie into two glasses and top with toasted coconut if desired.
Tips for the Best Pineapple Coconut Smoothie
A few small details can make a noticeable difference in the final texture and flavor.
- Use ripe pineapple: Sweet, ripe pineapple may mean you don’t need extra sweetener.
- Freeze your fruit: Frozen pineapple creates a thicker smoothie and reduces the need for ice.
- Don’t overdo the ice: Too much ice can water down the smoothie as it melts.
- Use canned coconut milk: It generally gives a richer result than a thin coconut beverage.
- Blend thoroughly: Give the blender enough time to break down the ice and fruit completely.
- Taste before sweetening: Pineapple and banana are naturally sweet, so extra sugar may not be necessary.
Pineapple Coconut Smoothie Variations
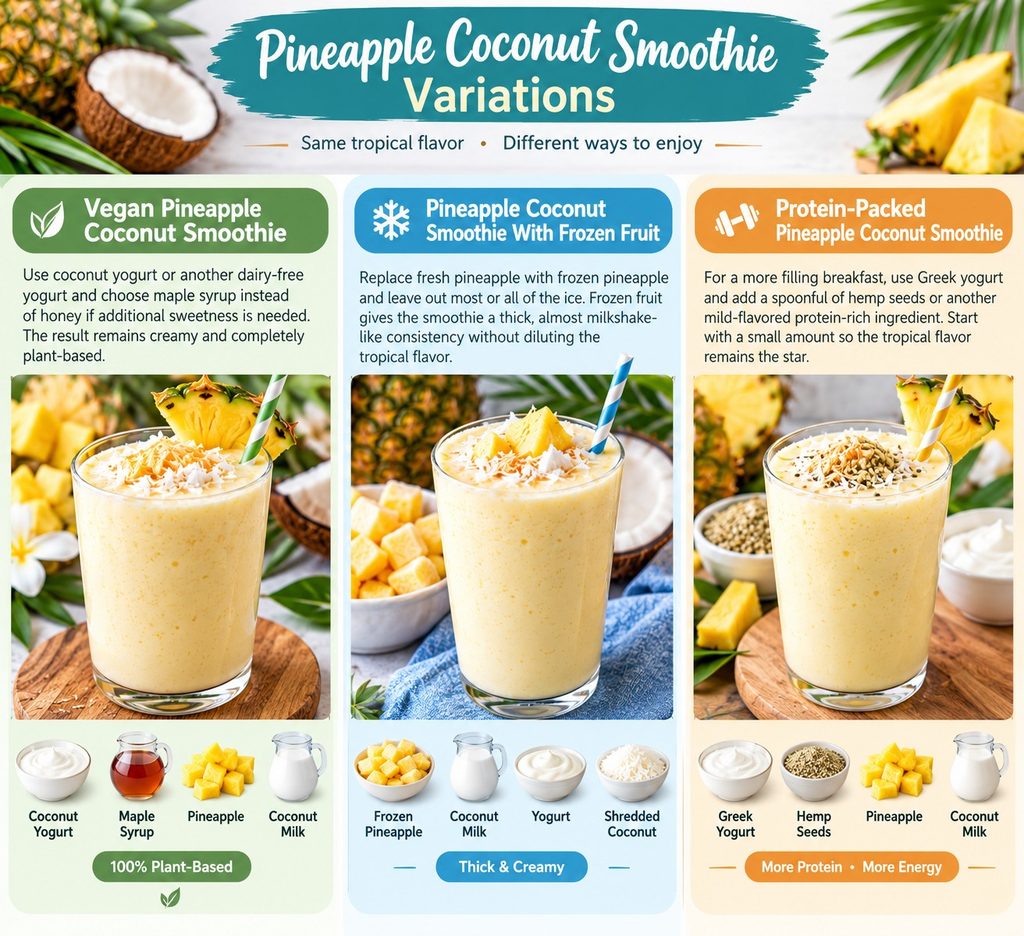
Once you have the basic recipe down, it is easy to change the flavor or nutrition.
Vegan Pineapple Coconut Smoothie
Use coconut yogurt or another dairy-free yogurt, and choose maple syrup instead of honey if you need extra sweetness. The result remains creamy and completely plant-based.
Pineapple Coconut Smoothie With Frozen Fruit
Use little to no ice and swap out fresh pineapple for frozen pineapple. Frozen fruit gives the smoothie a thick, almost milkshake-like consistency without diluting the tropical flavor.
Protein-Packed Pineapple Coconut Smoothie
For a more filling breakfast, use Greek yogurt and add a spoonful of hemp seeds or another mild-flavored, protein-rich ingredient. Start with a small amount so the tropical flavor remains the star.
What to Serve With Pineapple Coconut Smoothie
This smoothie works well on its own, but it can also become part of a more complete breakfast. Serve it alongside:
- Oatmeal topped with fresh fruit
- Whole-grain toast with nut butter
- Granola and yogurt
- Scrambled eggs
- Fresh fruit salad
- Homemade breakfast muffins
For a warm-weather treat, serve the smoothie in a chilled glass with toasted coconut sprinkled over the top.
How to Store Pineapple Coconut Smoothie
Smoothies are best immediately after blending because the texture is at its freshest. If you need to save leftovers, transfer the smoothie to an airtight container or jar and refrigerate it.
Try to enjoy it within the same day. Give it a good shake or stir before drinking because separation is natural.
For meal prep, you can portion chopped pineapple and other fruit into freezer bags ahead of time. When you are ready to prepare a smoothie, simply combine the frozen ingredients with the remaining ingredients in a blender.
Common Pineapple Coconut Smoothie Mistakes to Avoid
- Using too much liquid: This can leave you with a thin smoothie.
- Adding ice with frozen pineapple: You may end up with an unnecessarily icy texture.
- Using unripe pineapple: Tart pineapple can make the smoothie less balanced.
- Adding sweetener too early: Taste the blended smoothie first.
- Inadequately mixing the ice: A strong blender produces a smoother outcome.
- Using too much shredded coconut: Excess coconut can make the smoothie feel gritty rather than creamy.
Pineapple Coconut Smoothie FAQs
Can You Make Pineapple Coconut Smoothie Without Ice?
Yes. If you use frozen pineapple or frozen banana, the fruit can provide enough chill and thickness. Ice is most useful when using fresh fruit.
Can You Use Frozen Pineapple in Pineapple Coconut Smoothie?
Absolutely. Frozen pineapple is an excellent choice when you want a thick, cold smoothie. You can reduce or completely skip the ice.
Can You Make Pineapple Coconut Smoothie Without Yogurt?
Yes. Coconut milk and frozen fruit can still create a creamy drink without yogurt. You can also use a dairy-free yogurt alternative.
Is Pineapple Coconut Smoothie Vegan?
It can be. Use plant-based yogurt and maple syrup instead of honey. Check the labels of packaged ingredients if you need to avoid all animal-derived ingredients.
What Milk Is Best for Pineapple Coconut Smoothie?
Coconut milk is the natural choice for this recipe because it complements pineapple and creates a creamy tropical flavor. Almond, soy, or other plant-based milks can also be used for a lighter texture.
Pineapple Coconut Smoothie Nutrition
The nutrition will vary depending on the specific yogurt and coconut milk you use. For a smoothie made with the quantities above, an approximate serving may provide around 250–300 calories, along with carbohydrates, protein, fat, fiber, and vitamin C from the fruit and other ingredients.
For the most accurate information, calculate nutrition using the exact brands and quantities in your kitchen.
Pineapple Coconut Smoothie Recipe Card
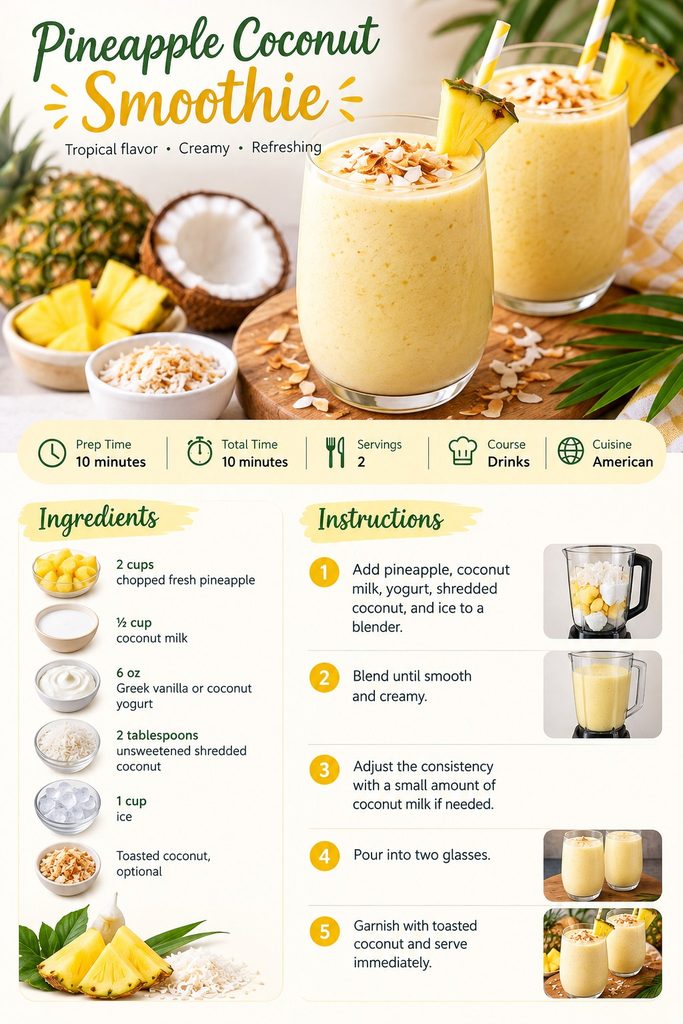
Prep Time: 10 minutes
Total Time: 10 minutes
Servings: 2
Course: Drinks
Cuisine: American
Ingredients:
- 2 cups chopped fresh pineapple
- ½ cup coconut milk
- 6 oz Greek vanilla or coconut yogurt
- 2 tablespoons unsweetened shredded coconut
- 1 cup ice
- Toasted coconut, optional
Instructions:
- Add pineapple, coconut milk, yogurt, shredded coconut, and ice to a blender.
- Blend until smooth and creamy.
- Adjust the consistency with a small amount of coconut milk if needed.
- Pour into two glasses.
- Garnish with toasted coconut and serve immediately.
Conclusion: Enjoy Your Pineapple Coconut Smoothie
This pineapple coconut smoothie proves that a delicious tropical drink does not need a long ingredient list or complicated preparation. With juicy pineapple, creamy coconut milk, yogurt, and a few minutes of blending, you can have a refreshing smoothie ready for breakfast or snack time.
Use frozen pineapple when you want an extra-thick texture, experiment with dairy-free yogurt for a vegan version, or add your favorite nutritious mix-ins. However you make it, the bright pineapple and creamy coconut combination is a simple way to bring a little tropical flavor to your day.

Introduction
This beet juice recipe is an easy way to turn fresh vegetables and fruit into a bright, refreshing homemade drink. Fresh beets have a naturally earthy flavor, but when they are combined with sweet apple and carrots, juicy orange, lemon, crisp cucumber, and fresh ginger, the flavor becomes much more balanced. The result is a vibrant red beet juice that is fresh, lightly sweet, and full of natural flavor.
You can prepare this recipe with a juicer or a high-speed blender, making it easy to enjoy even if you do not own a dedicated juicing machine. The recipe is also flexible. Add more apple for sweetness, extra lemon for brightness, or a little more ginger for a stronger kick. Whether you enjoy fresh beet juice with breakfast or want a refreshing drink after a workout, this simple combination is a great place to start.
Why You’ll Love This Beet Juice Recipe
- Quick and easy: It takes about 10 minutes to prepare.
- Naturally sweet: Apple and carrots balance the earthy taste of beets.
- Fresh and colorful: Beets, citrus, and cucumber create a vibrant drink.
- No added sugar: The sweetness comes naturally from fruit and vegetables.
- Juicer- or blender-friendly: You can use whichever equipment you have.
- Easy to customize: Add pineapple, berries, greens, or pomegranate.
- Refreshing: Serve it chilled for a crisp and bright drink.
- Great with breakfast: Pair it with eggs, yogurt, oatmeal, or whole-grain toast.
Beet Juice Recipe Ingredients

For about 2 servings, you will need:
- 2 small red beets, peeled and chopped
- One large cored and sliced Gala or Fuji apple
- 2 medium carrots, peeled and chopped
- 1 Persian cucumber, chopped
- 1 lemon, peeled and chopped
- 1 orange, peeled and chopped
- 1-inch piece of fresh ginger, peeled
- 1 cup water, only for the blender method
- ½ teaspoon sumac, optional
Choose firm, fresh beets without soft spots. Gala and Fuji apples are especially good because they provide natural sweetness without overpowering the vegetables.
For the freshest flavor, use produce that is ripe and in good condition. If you can find organic beetroot juice ingredients locally, organic produce can also be used, although organic is not required for this recipe.
Equipment Needed for beet juice recipe
You only need a few basic kitchen tools:
- Juicer or high-speed blender
- Cutting board
- Sharp knife
- Vegetable peeler
- Fine-mesh strainer or nut milk bag
- Large bowl or jug
- Serving glasses
A juicer produces a thinner, cleaner juice, while a blender allows you to use more of the whole produce before straining.
How to Make This Beet Juice Recipe
1. Wash and Prepare the Produce

Rinse the beets, carrots, apple, cucumber, lemon, orange, and ginger thoroughly under cool running water.
Peel the beets, carrots, citrus fruits, and ginger. Core the apple and chop the larger ingredients into pieces that will fit comfortably into your juicer or blender.
If you are making raw beet juice, there is no need to cook the beets first.
2. Make Beet Juice in a Juicer

One by one, add the prepared ingredients to your juicer. Alternate firm ingredients such as beet and carrot with softer ingredients such as apple and cucumber.
Start with the beets, followed by carrots, apple, cucumber, orange, lemon, and ginger. Stir the finished juice well so the flavors are evenly distributed.
Serve the juice right away after pouring it into cold glasses.
3. Make Beet Juice in a Blender

Add the prepared beets, apple, carrots, cucumber, lemon, orange, and ginger to a high-speed blender. Add about 1 cup of water. Blend on high until the mixture becomes as smooth and liquid as possible.
Place a fine-mesh strainer or nut milk bag over a large bowl or jug. Pour the blended mixture through it and press the pulp gently with a spoon to extract the liquid. Transfer the juice to glasses and serve chilled.
4. Adjust the Flavor
Taste the juice before serving. If it is too earthy, add a little more apple or orange. If you want more acidity, add extra lemon.
For a stronger flavor, add a small amount of ginger. You can also stir in a pinch of sumac for a subtle tangy note.
Beet Juice and Blood Pressure
Dietary nitrates, which have been researched for their effects on blood vessels and blood pressure, are abundant in beets. Research has investigated whether nitrate-rich beetroot products can contribute to reductions in blood pressure in some people. However, results vary, and beet juice should not be considered a replacement for prescribed treatment or medical advice.
Searches for terms such as “beet juice for high blood pressure,” “beets for high blood pressure,” “beets lower blood pressure,” and “beet juice to lower blood pressure” often reflect interest in the nitrate content of beets. The evidence is about dietary beetroot and nitrate intake, not a guarantee that drinking a particular juice will lower an individual’s blood pressure.
If you take blood-pressure medication or have a medical condition, talk with your healthcare professional before making concentrated beet products a regular part of your diet.
Beet Juice Recipe Combinations to Try
Beet Juice with Apple and Carrot
Apple and carrot are two of the easiest ingredients to pair with beets. Their natural sweetness helps soften the earthy flavor of beetroot, making this combination approachable for beginners.
Beet Juice with Citrus and Ginger
Orange and lemon add brightness, while ginger provides gentle warmth. This combination is particularly refreshing when served cold.
Beet Juice with Cucumber and Greens
Cucumber creates a lighter, cleaner flavor. For a greener variation, add spinach, parsley, celery, or a small handful of beet greens.
Beet Juice with Berries
Strawberries and blueberries can make beet juice fruitier and sweeter. They also pair nicely with the earthy flavor of beetroot.
Tropical Beet Juice
Try adding pineapple, orange, and a squeeze of lime. Pineapple provides plenty of sweetness, while lime gives the juice a fresh, tangy finish.
Beetroot and Pomegranate Juice
Pomegranate adds a naturally fruity flavor and works especially well with red beetroot. Add a small amount at first and adjust according to your taste.
Fresh Beet Juice vs. Beet Juice Supplements
Many beet products are available, including beetroot shots, beet juice supplement powders, capsules, and concentrated drinks.
A homemade juice gives you control over the ingredients and lets you adjust the flavor yourself. Supplements are more convenient, but their ingredient lists and nitrate content can vary considerably between products.
You may also see terms such as beet root supplement, beet root extract, and beetroot juice supplement on product labels. These products are not identical to freshly prepared juice. Some contain concentrated beetroot compounds, while others may include additional ingredients.
If you are comparing supplements with food-based beet juice, read the serving size and ingredient information carefully rather than assuming that all beet products provide the same amount of beetroot or nitrate.
Tips for Making the Best Beet Juice
- Use fresh produce: Firm, fresh beets usually give the best flavor.
- Choose sweet apples: Gala and Fuji are excellent choices.
- Balance the beet flavor: Add apple, carrot, orange, or cucumber if the juice tastes too earthy.
- Go easy on ginger: A small piece can add plenty of flavor.
- Peel citrus: Removing the peel helps prevent bitterness.
- Chill your ingredients: Cold produce can make the finished drink more refreshing.
- Do not overfill your blender: Work in batches if necessary.
- Strain carefully: A nut milk bag produces a smoother drink than a coarse strainer.
- Drink it fresh: Homemade juice generally tastes best soon after preparation.
Beet Juice Recipe Variations

Once you have made the basic recipe, you can experiment with different ingredients.
Spicy Beet Juice
Add a small piece of fresh jalapeño for a gentle spicy kick.
Berry Beet Juice
Replace some of the apple with fresh strawberries or blueberries.
Green Beet Juice
Add spinach, parsley, celery, or additional cucumber for a greener variation.
Tropical Beet Juice
Blend beetroot with pineapple, orange, and lime for a sweet tropical flavor.
Citrus Beet Juice
Increase the amount of orange and lemon while keeping the ginger for a bright, zesty drink.
Golden Beet Juice
Replace the red beets with golden beets. The flavor can be milder, and the finished drink has a completely different appearance.
Beet Juice as a Pre-Workout Drink
You may come across beet juice pre-workout products because beetroot and dietary nitrates have been studied in sports nutrition. Some athletes use beetroot-based drinks before exercise.
If you want to try beet juice before a workout, homemade juice can be an option. However, individual responses differ, and this recipe is not designed as a performance treatment or a substitute for proper hydration and nutrition.
For everyday use, enjoy a small serving alongside a balanced meal or snack rather than relying on juice alone.
Serving Suggestions for Beet Juice Recipe
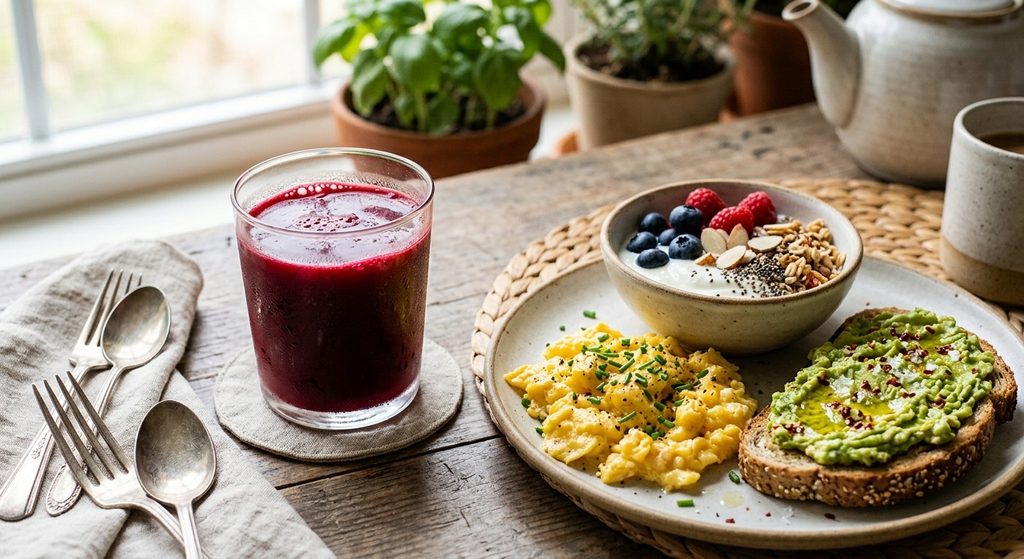
Serve this pure beet juice chilled in a small glass alongside breakfast or a light snack.
Good foods to pair with it include:
- Scrambled or boiled eggs
- Vegetable omelets
- Greek yogurt with fruit
- Whole-grain toast with nut butter
- Oatmeal with nuts and seeds
- Vegetable frittata
- Egg muffins
- Avocado toast
Juice is generally less filling than a whole-food meal, so pairing it with protein, fiber, and healthy fats can make breakfast more satisfying.
How to Store Beet Juice
Fresh juice is best enjoyed shortly after preparation. If you need to store it, pour it into a clean, airtight glass container and refrigerate it promptly.
For the best freshness and flavor, aim to drink homemade juice within 24 hours. Separation is completely normal. Shake or stir the juice before serving.
You don’t need to reheat beet juice. It can be served cold or allowed to come closer to room temperature before drinking.
Common Mistakes to Avoid
1. Using Too Many Beets
Too much beetroot can make the drink strongly earthy. Start with the recommended amount and adjust it in future batches.
2. Skipping the Fruit
Apple and orange help balance the natural earthiness of beetroot. Leaving them out may result in a stronger vegetable flavor.
3. Adding Too Much Ginger
Ginger has a powerful flavor. Start with a small piece and add more if you prefer a stronger taste.
4. Leaving Citrus Peel On
The peel and white pith can make homemade juice bitter. Peel lemons and oranges before adding them.
5. Overloading the Blender
Large chunks of raw beet and carrot can be difficult for some blenders to process. Cut firm vegetables into smaller pieces.
6. Making the Juice Too Thin
When using a blender, add water gradually. Too much water can dilute the natural flavor.
7. Expecting Juice to Replace a Meal
Although this drink contains fruit and vegetables, juice alone may not keep you full for long. Pair it with a balanced meal.
Frequently Asked Questions
Is this beet juice recipe healthy?
This recipe provides nutrients from beets, carrots, apple, cucumber, lemon, orange, and ginger. It can be included in a balanced, diversified diet. Because the juice is strained, it contains less fiber than eating the whole fruits and vegetables.
Can I drink beet juice every day?
Beet juice can fit into a varied diet, but there is no requirement to drink it every day. If you have a medical condition or take medication, discuss regular consumption of concentrated beet products with your healthcare professional.
Can beet juice lower blood pressure?
Beetroot contains dietary nitrates, and studies have examined whether nitrate-rich beetroot products can reduce blood pressure in some people. However, effects vary, and beet juice should not replace blood-pressure medication or professional medical care.
What is the best beet juice to buy?
If you prefer a packaged product, compare the ingredient list, serving size, added sugars, and amount of beetroot. Products marketed as 100 beet juice, pure beetroot juice, or organic beetroot juice can differ in their formulation, so check the label rather than relying only on the product name.
What is Lakewood beet juice?
Lakewood beet juice and Lakewood organic beet juice are examples of packaged beetroot juice products. If you are comparing bottled juice with this homemade beet juice recipe, check the product label for ingredients, serving size, and whether other juices or sweeteners have been added.
Can I use beetroot shots instead of fresh beet juice?
Beetroot shots are concentrated products and are not the same as homemade juice. They may be convenient, but their formulation and concentration can vary. Check the label for serving information and ingredients.
Is pure beet juice the same as beetroot extract?
No. Pure beet juice is a juice made from beetroot, while beet root extract is a concentrated ingredient produced using an extraction process. They should not automatically be considered interchangeable.
Can I use a beet juice supplement instead of this recipe?
You can choose a supplement if convenience is your priority, but supplements are different from freshly prepared juice. A beet juice supplement or beetroot juice supplement may contain concentrated beetroot or extract and can have other ingredients. Follow the product’s directions and speak with a healthcare professional if you have questions about whether it is appropriate for you.
Nutrition Information
The following values are approximate and will vary depending on the size and type of produce used and how much pulp is removed:
- Calories: 150–170 per serving
- Carbohydrates: 35–40 g
- Protein: 2–4 g
- Fat: Less than 1 g
- Fiber: Varies depending on straining
- Natural sugars: Primarily from fruits and vegetables
- Vitamin C: Mainly from lemon and orange
- Potassium: Provided by beets, citrus, carrots, and other produce
These values are estimates and are not laboratory-tested.
Beet Juice Recipe Card
Beet Juice Recipe
Prep Time: 10 minutes
Total Time: 10 minutes
Servings: 2
Course: Drinks
Ingredients
- 2 small red beets, peeled and chopped
- One large cored and sliced Gala or Fuji apple
- 2 medium carrots, peeled and chopped
- 1 Persian cucumber, chopped
- 1 lemon, peeled and chopped
- 1 orange, peeled and chopped
- 1-inch piece of fresh ginger, peeled
- 1 cup water, for blender method
- ½ teaspoon sumac, optional
Instructions
- Wash and prepare all the produce.
- Peel the beets, carrots, citrus, and ginger. Core the apple and chop everything into suitable pieces.
- For the juicer method, process all ingredients through the juicer and stir the finished juice.
- For the blender method, add the produce and 1 cup of water. Blend until smooth.
- Use a nut milk bag or a fine-mesh strainer to filter the combined mixture.
- Pour into serving glasses.
- Serve chilled and enjoy fresh.
Conclusion
This beet juice recipe is a simple and flexible way to enjoy fresh beetroot with naturally sweet fruit and crisp vegetables. Apple and carrot help balance the earthy beet flavor, while orange, lemon, cucumber, and ginger make every glass bright and refreshing.
You can keep the recipe exactly as written or experiment with pineapple, berries, pomegranate, greens, or golden beets. Whether you use a juicer or blender, homemade fresh beet juice is easy to prepare and can be enjoyed alongside a balanced breakfast or snack.
If you are interested in beet juice because of its potential relationship with blood pressure, remember that research on beetroot and dietary nitrates does not make juice a substitute for medical treatment. Enjoy it as one part of a varied diet and choose the ingredients and serving size that work best for you.
Introduction
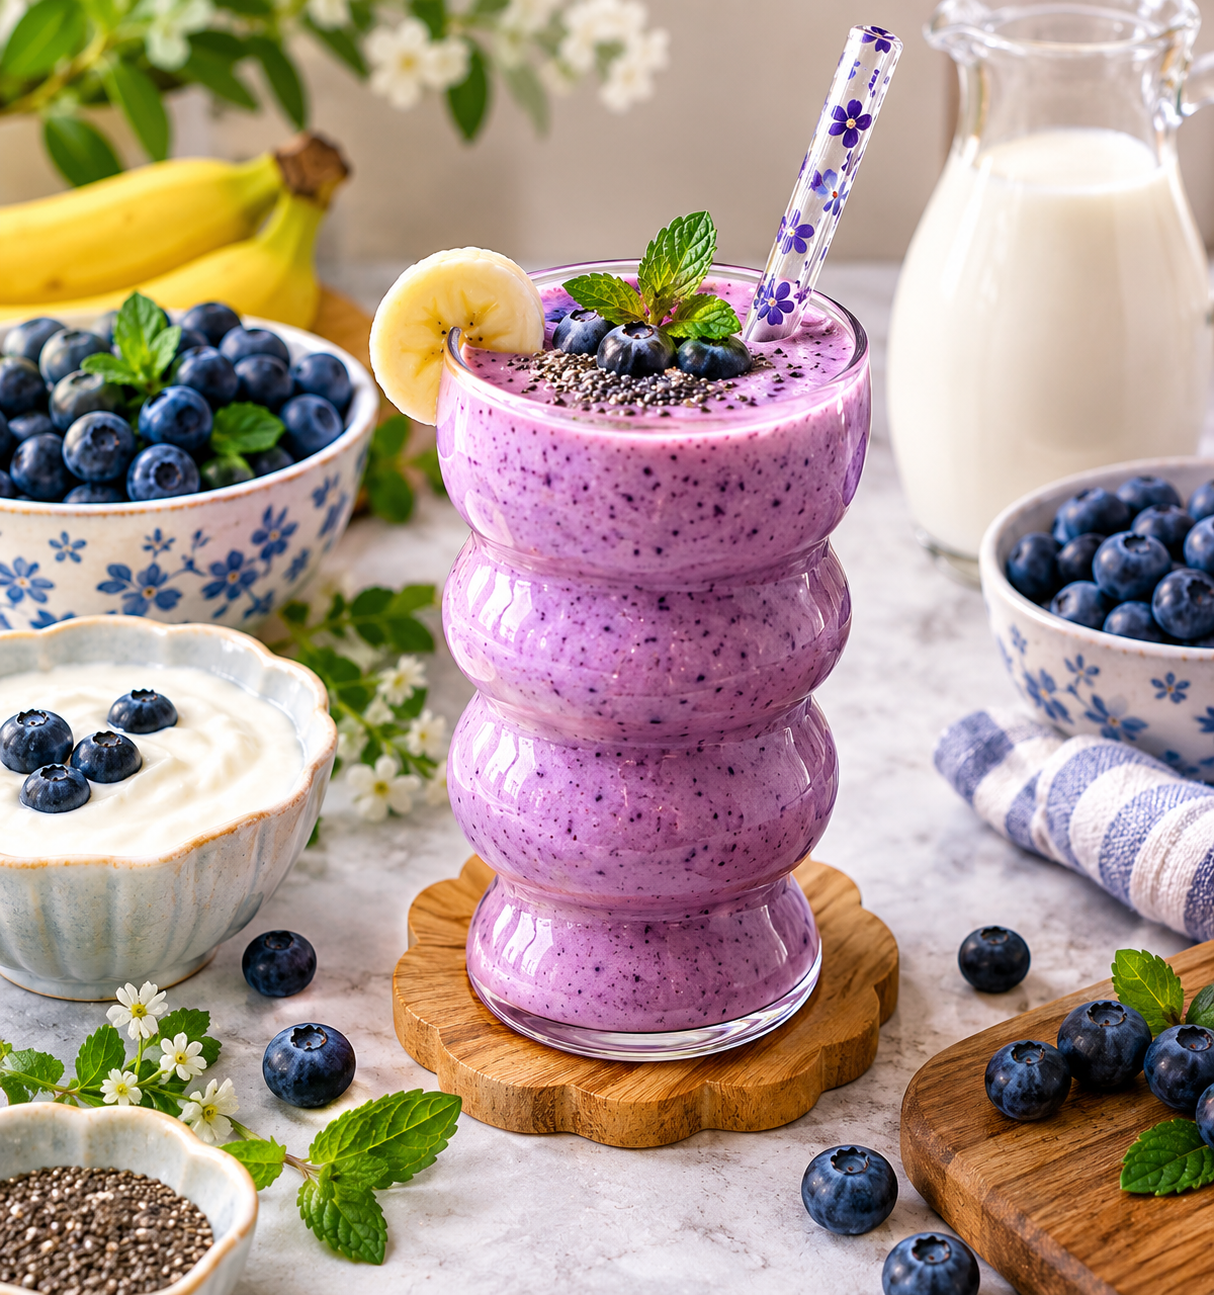
A blueberry smoothie recipe is a quick and creamy drink made with sweet blueberries, yogurt, and milk. It takes only a few minutes to prepare and makes an easy breakfast, afternoon snack, or refreshing drink. The blueberries give it a naturally fruity flavor and beautiful color, while yogurt adds a smooth and creamy texture.
This recipe is also easy to customize. You can use fresh or frozen blueberries, add a banana for a blueberry banana smoothie, or combine the berries with strawberries or raspberries for a mixed-berry version. With a few simple ingredients and a blender, you can make a satisfying smoothie without complicated preparation.
Why You’ll Love This Blueberry Smoothie Recipe
- Fast to prepare: It only takes a few minutes to assemble everything.
- Creamy texture: Yogurt makes the smoothie thick and smooth.
- Fresh berry flavor: Blueberries provide a sweet and slightly tangy taste.
- Easy to customize: Add banana, strawberries, raspberries, or spinach.
- Great for breakfast: Pair it with toast, oats, or eggs for a simple morning meal.
- Family-friendly: The naturally colorful smoothie is easy to enjoy at any age.
Ingredients For Blueberry Smoothie Recipe
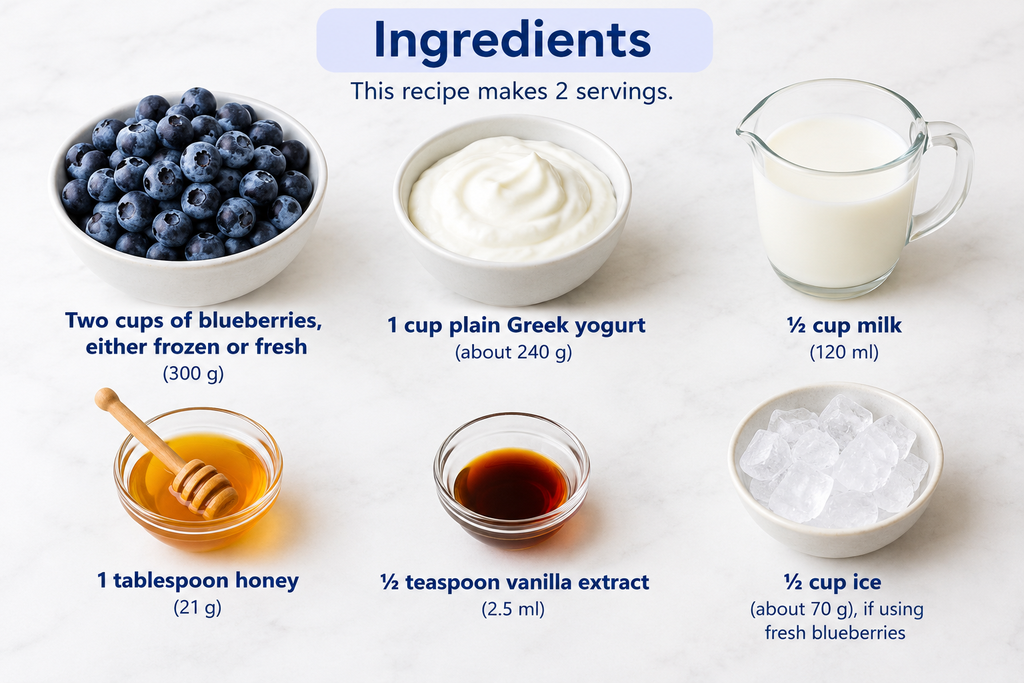
This recipe makes 2 servings.
- Two cups of blueberries, either frozen or fresh (300 g)
- 1 cup plain Greek yogurt (about 240 g)
- ½ cup milk (120 ml)
- 1 tablespoon honey (21 g)
- ½ teaspoon vanilla extract (2.5 ml)
- ½ cup ice (about 70 g), if using fresh blueberries
Ingredient Notes For Blueberry Smoothie Recipe
Blueberries: Fresh blueberries work well, but frozen blueberries are excellent when you want a thicker, colder smoothie.
Greek yogurt: Plain Greek yogurt gives the smoothie a creamy texture and mild tang. You can use regular yogurt if preferred.
Milk: Dairy milk works well, but unsweetened almond, oat, soy, or another suitable milk can be used for a dairy-free variation.
Honey: Honey adds sweetness and can be adjusted according to the natural sweetness of the blueberries.
Vanilla extract: A small amount enhances the fruity flavor and adds warmth.
Ice: Ice is optional when using frozen blueberries. You may need it when using fresh berries.
Step-by-Step Instructions For Blueberry Smoothie Recipe
1. Prepare the Blueberries
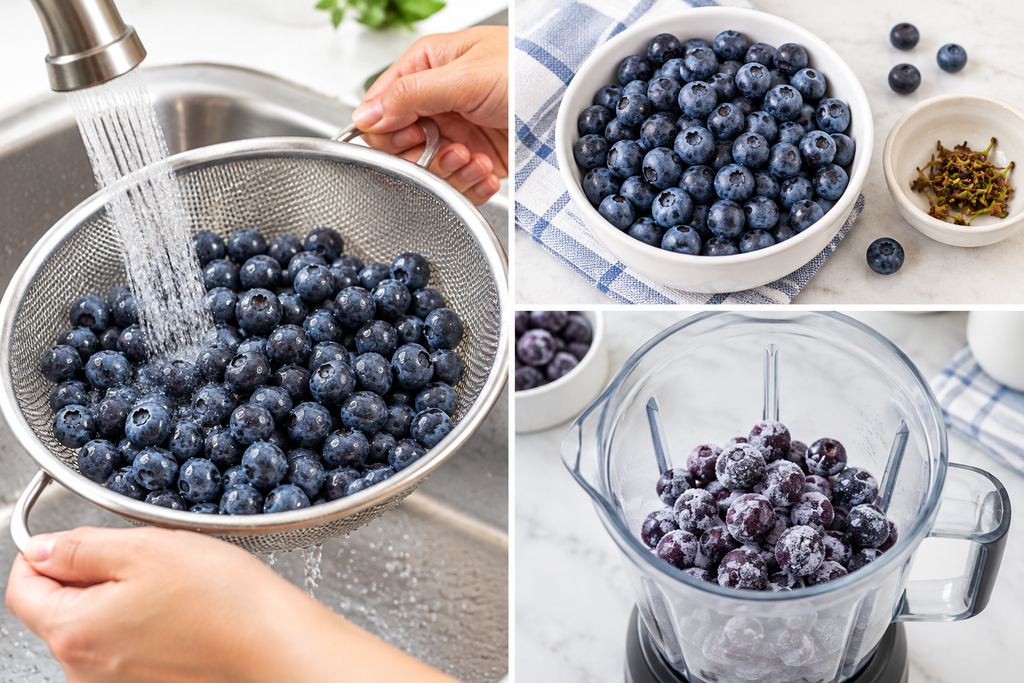
If using fresh blueberries, rinse them gently under cool running water and drain well. Remove any stems or damaged berries. You can put frozen blueberries straight into the blender.
2. Add the Ingredients to the Blender
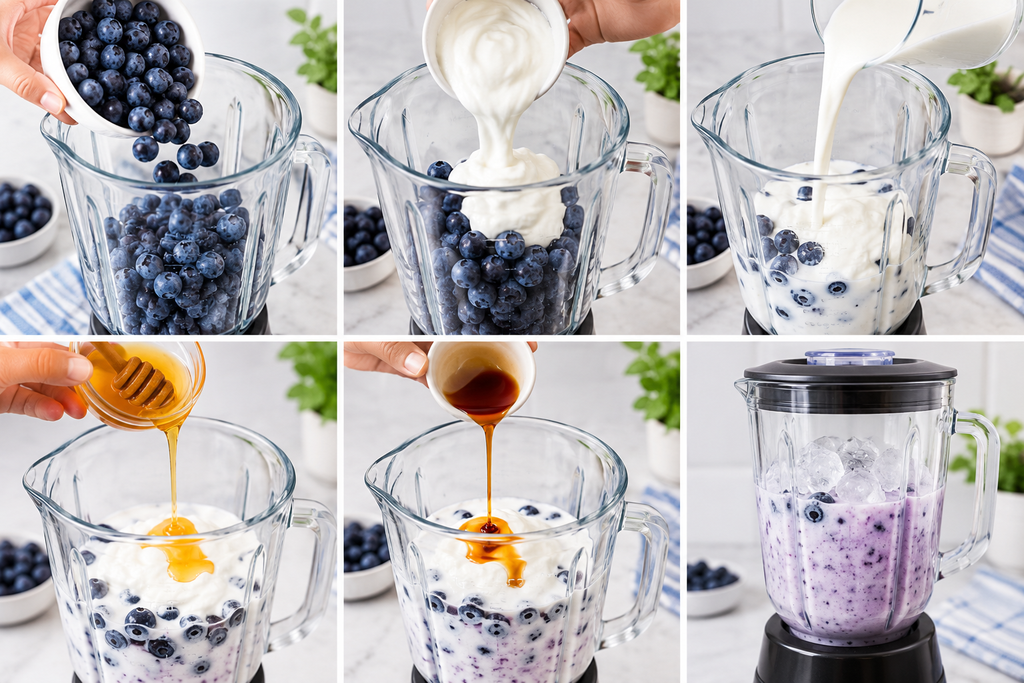
Add the blueberries, Greek yogurt, milk, honey, and vanilla extract to a blender. If you are using fresh blueberries and want a colder smoothie, add the ice as well.
3. Blend Until Smooth
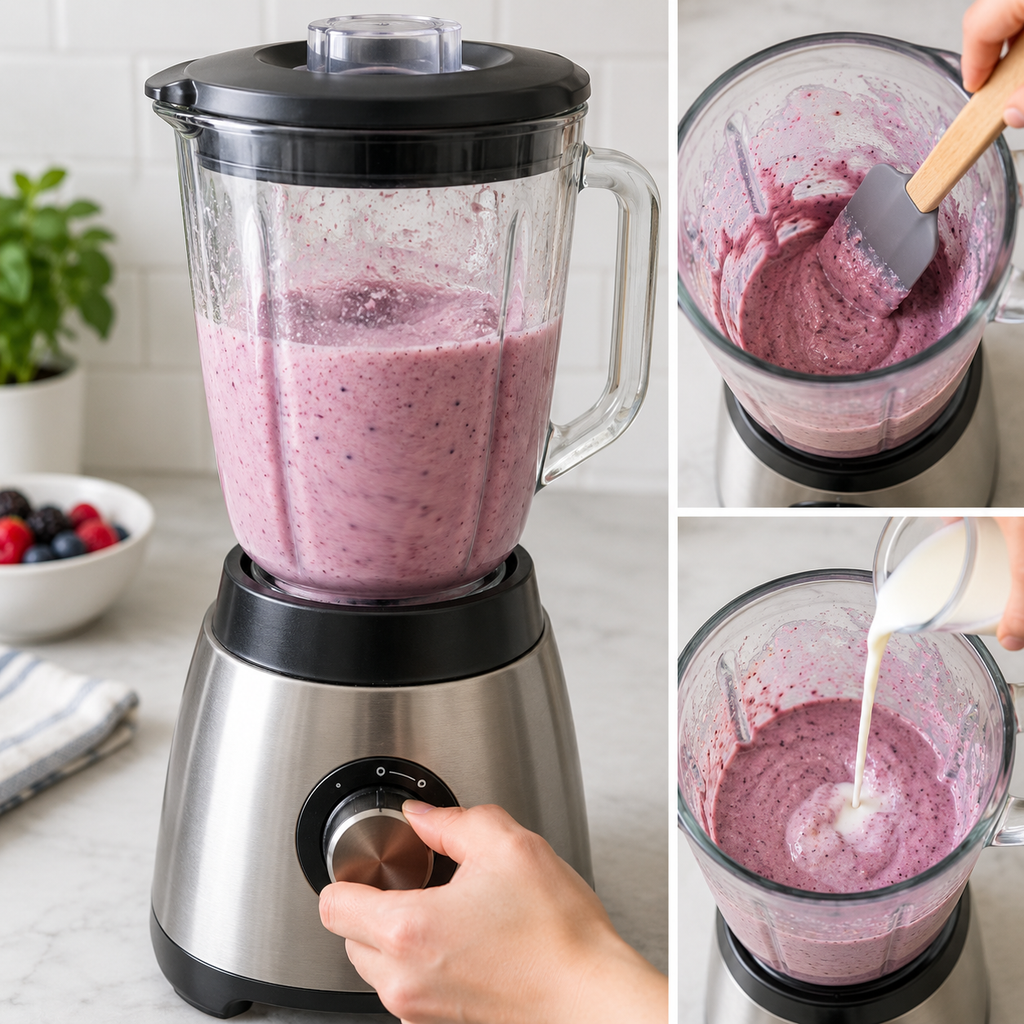
Secure the blender lid and blend on medium to high speed for about 30–60 seconds, or until the mixture looks smooth and creamy. If the mixture is difficult to blend, stop the blender and scrape down the sides with a spatula. Add a small splash of milk if necessary.
4. Check the Consistency
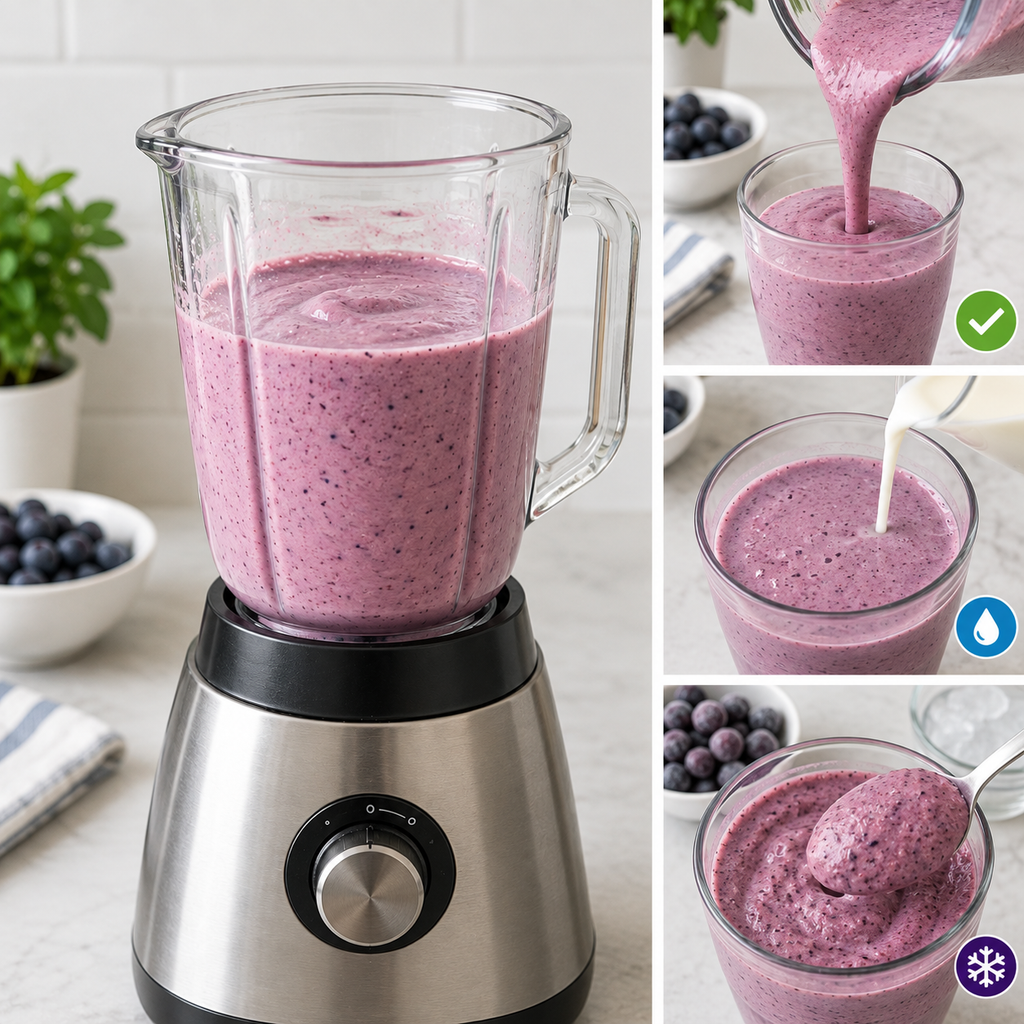
Check the smoothie after blending. It should be creamy and thick but easy to pour. For a thinner smoothie, add a little more milk. For a thicker texture, add a few more frozen blueberries or a small amount of ice.
5. Taste and Serve
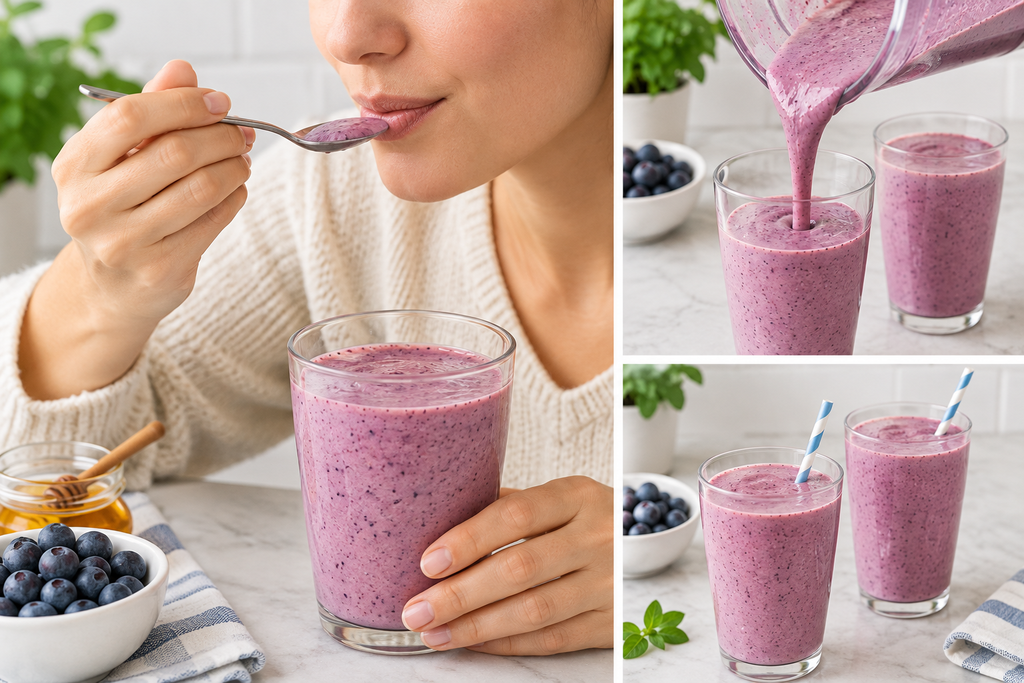
Taste the smoothie before serving. If your blueberries are particularly tart, you can add a little more honey if desired. Pour into two glasses and serve immediately.
Expert Tips for the Best Results
- Use frozen blueberries for thickness: They create a colder, thicker smoothie without requiring much ice.
- Choose ripe blueberries: Naturally sweet berries can reduce the need for added sweetener.
- Add liquid gradually: Too much milk can make the smoothie watery.
- Blend thoroughly: Give the ingredients enough time to become completely smooth.
- Don’t overuse ice: Excessive ice can dilute the blueberry flavor.
- Use Greek yogurt for extra creaminess: Its thicker consistency gives the smoothie more body.
- Taste before sweetening: Blueberry sweetness can vary significantly from batch to batch.
- Chill your ingredients: Cold yogurt and fruit help create a refreshing drink.
- Serve immediately: Smoothies generally have their best texture shortly after blending.
- Adjust gradually: Make small changes to the milk, fruit, or sweetness rather than changing the recipe significantly at once.
Common Mistakes to Avoid
Adding Too Much Milk
Too much liquid can make your smoothie thin. Start with the recommended ½ cup and add more only if necessary.
Using Too Much Ice
Ice can make the drink cold, but too much can water down the berry flavor. Frozen blueberries are a better option when you want both thickness and chill.
Skipping the Taste Test
Blueberries vary in sweetness. Always taste the finished smoothie before adding extra honey.
Not Blending Thoroughly
Under-blending can leave pieces of fruit or yogurt behind. Blend until the mixture has a consistent, creamy texture.
Overfilling the Blender
Do not exceed your blender’s recommended capacity. If doubling the recipe, blend it in batches if necessary.
Variations and Substitutions
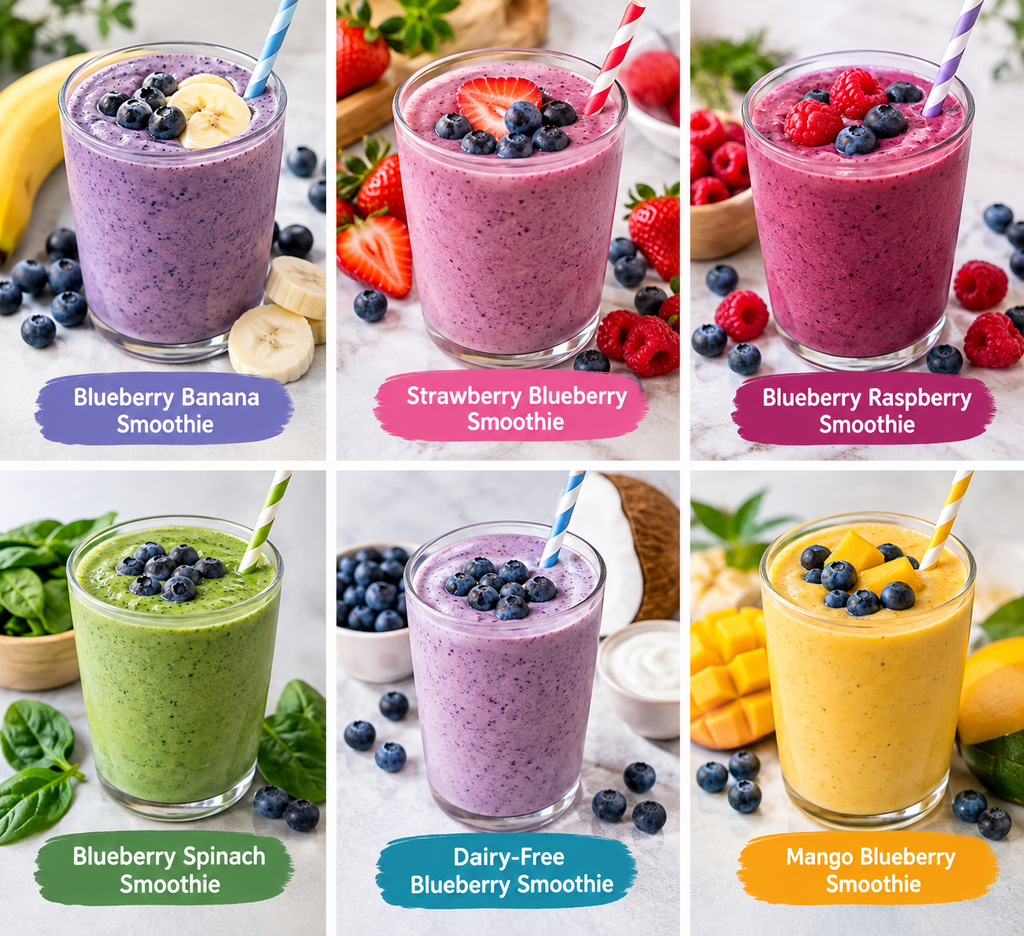
Blueberry Banana Smoothie
Add 1 ripe banana to the recipe for a thicker and naturally sweet blueberry banana smoothie. You may need a little additional milk to achieve your preferred consistency.
Strawberry Blueberry Smoothie
Swap out some of the blueberries for frozen or fresh strawberries. The combination creates a bright and fruity strawberry blueberry smoothie.
Blueberry Raspberry Smoothie
Add raspberries for a more tangy berry flavor. This makes a refreshing blueberry raspberry smoothie with a deeper berry taste.
Blueberry Spinach Smoothie
Add 1 small handful of fresh baby spinach for a simple blueberry spinach smoothie. Blend thoroughly until the spinach is fully incorporated.
Dairy-Free Blueberry Smoothie
Replace Greek yogurt with a suitable plant-based yogurt and use unsweetened almond, oat, soy, or coconut milk.
Mango Blueberry Smoothie
Add mango for a tropical variation. Mango’s sweetness pairs well with the slightly tart flavor of blueberries.
Storage and Reheating
A blueberry smoothie is best served immediately after blending. If you have leftovers, transfer the smoothie to a clean, covered container and refrigerate promptly. For the best texture, consume it within 24 hours and shake or stir well before drinking.
You can also freeze the smoothie in an appropriate freezer-safe container. Leave some room for expansion, then thaw it in the refrigerator and blend again to restore a smoother texture. Do not reheat a smoothie. It is intended to be served cold.
Serving Suggestions For Blueberry Smoothie Recipe
Serve this smoothie alongside:
- Whole-grain toast
- Oatmeal
- Overnight oats
- Granola
- Fresh fruit
- Scrambled eggs
- Yogurt bowls
- Pancakes or waffles
- Whole-grain muffins
For an attractive finish, garnish with a few fresh blueberries, a spoonful of yogurt, or a small sprinkle of granola.
Frequently Asked Questions For Blueberry Smoothie Recipe
Can I use frozen blueberries?
Yes. Frozen blueberries are an excellent choice for a frozen blueberry smoothie because they make the drink colder and thicker.
Can I make this blueberry smoothie with yogurt?
Yes. Greek yogurt works particularly well because it creates a creamy consistency. Regular or suitable dairy-free yogurt can also be used.
How can I make a blueberry banana smoothie?
Blend the basic recipe until smooth after adding one ripe banana. You can adjust the milk slightly if the smoothie becomes too thick.
Can I add spinach to this smoothie?
Yes. A small handful of baby spinach works well in a blueberry spinach smoothie. Blend thoroughly so the leaves are fully broken down.
How long does a blueberry smoothie last in the refrigerator?
For the best texture and flavor, drink it soon after preparation. If refrigerated promptly in a covered container, leftovers are best consumed within about 24 hours.
Nutrition Information of Blueberry Smoothie Recipe
Estimated nutrition per serving, based on 2 servings and the ingredient quantities above. Values will vary depending on the specific yogurt, milk, blueberries, and honey used.
| Nutrient | Amount per serving | Approx. % Daily Value |
| Calories | 260 kcal | 13% |
| Total Fat | 5 g | 6% |
| Saturated Fat | 2.5 g | 13% |
| Cholesterol | 15 mg | 5% |
| Sodium | 75 mg | 3% |
| Total Carbohydrates | 42 g | 15% |
| Dietary Fiber | 5 g | 18% |
| Total Sugars | 34 g | — |
| Protein | 15 g | 30% |
| Calcium | 190 mg | 15% |
| Iron | 1 mg | 6% |
| Potassium | 390 mg | 8% |
These figures are approximate and should be recalculated using the exact brands and ingredients used.
Recipe Card
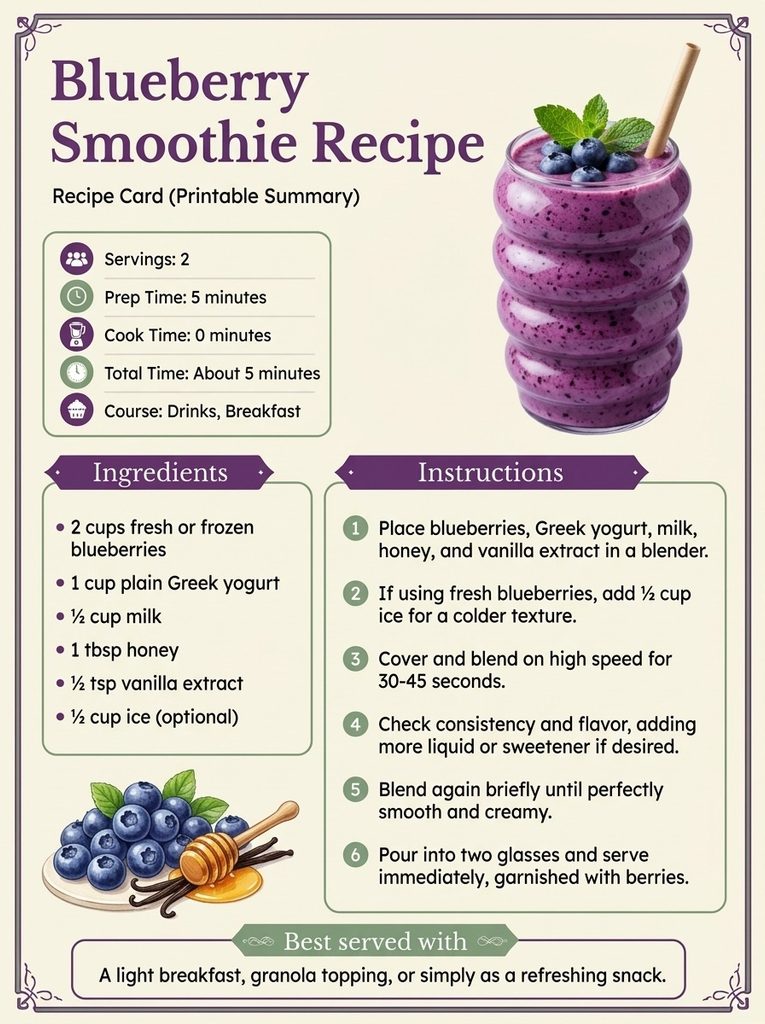
Blueberry Smoothie Recipe
Prep Time: 5 minutes
Total Time: 5 minutes
Servings: 2
Course: Drinks, Breakfast
Cuisine: American
Ingredients
- 2 cups fresh or frozen blueberries
- 1 cup plain Greek yogurt
- ½ cup milk
- 1 tablespoon honey
- ½ teaspoon vanilla extract
- ½ cup ice, if using fresh blueberries
Instructions
- Rinse fresh blueberries and drain well. If using frozen blueberries, use them directly.
- In a blender, add the blueberries, Greek yogurt, milk, honey, vanilla, and ice if necessary.
- Blend for 30–60 seconds until smooth and creamy.
- If the smoothie is too thick, add a tiny bit of milk.
- Taste and adjust sweetness if needed.
- Pour into two glasses and serve immediately.
Conclusion
You can easily incorporate this blueberry smoothie recipe into your breakfast and snack routine. In only a few minutes, creamy Greek yogurt, juicy blueberries, milk, honey, and vanilla combine to create a cool beverage with lots of berry flavor. You can use frozen blueberries for a thicker texture or customize the recipe with banana, strawberries, raspberries, mango, or spinach. Once you have the basic combination, it is simple to adjust the consistency and flavor to suit your preference. Blend, pour, and enjoy it cold for the freshest texture.
Introduction
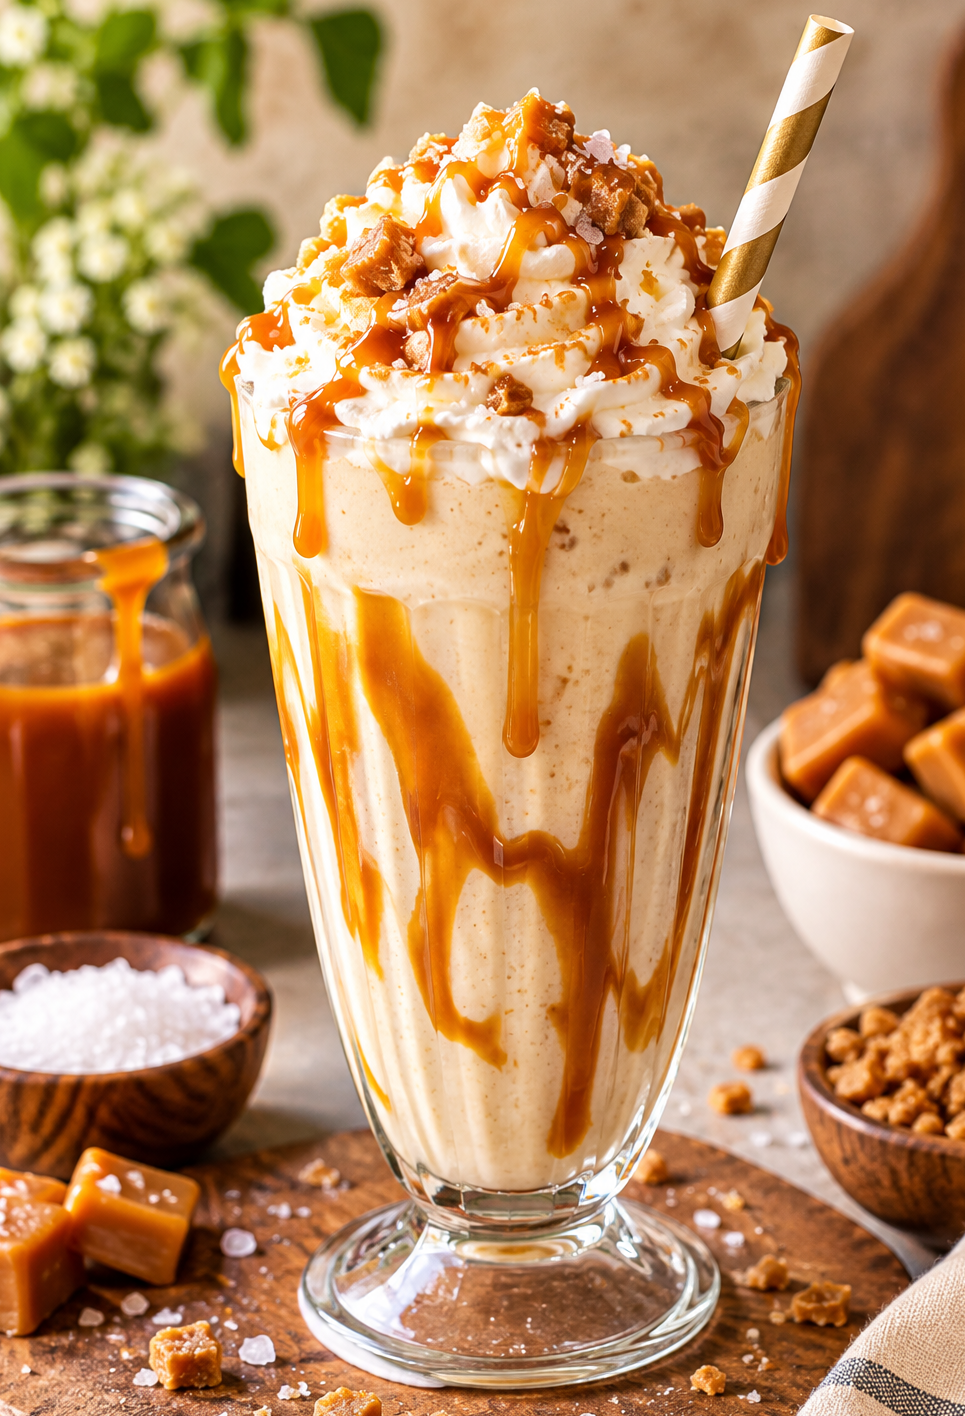
A Salted Caramel Milkshake is the kind of treat that feels special without requiring much effort. It combines creamy vanilla ice cream, cold milk, rich caramel sauce, and a small pinch of salt to create a sweet-and-salty drink with plenty of flavor. The result is thick, smooth, and perfect when you want a dessert you can enjoy with a straw.
How quickly this milkshake is made is its finest feature. With a blender and a handful of simple ingredients, you can have two generous servings ready in about five minutes. Add whipped cream and a caramel drizzle for a diner-style finish, or keep it simple when you’re craving something sweet right away.
Why You’ll Love This Salted Caramel Milkshake
- Quick to make: The process takes a few minutes.
- Thick and creamy: The milkshake has a rich texture due to Vanilla ice cream.
- Sweet and salty: Sea salt keeps the caramel flavor from becoming overly sweet.
- Easy ingredients: Most of the ingredients can be kept in your freezer or pantry.
- Customizable: You can adjust the caramel, toppings, and even the type of milk.
- Perfect for sharing: This recipe makes two generous milkshakes.
Salted Caramel Milkshake Ingredients
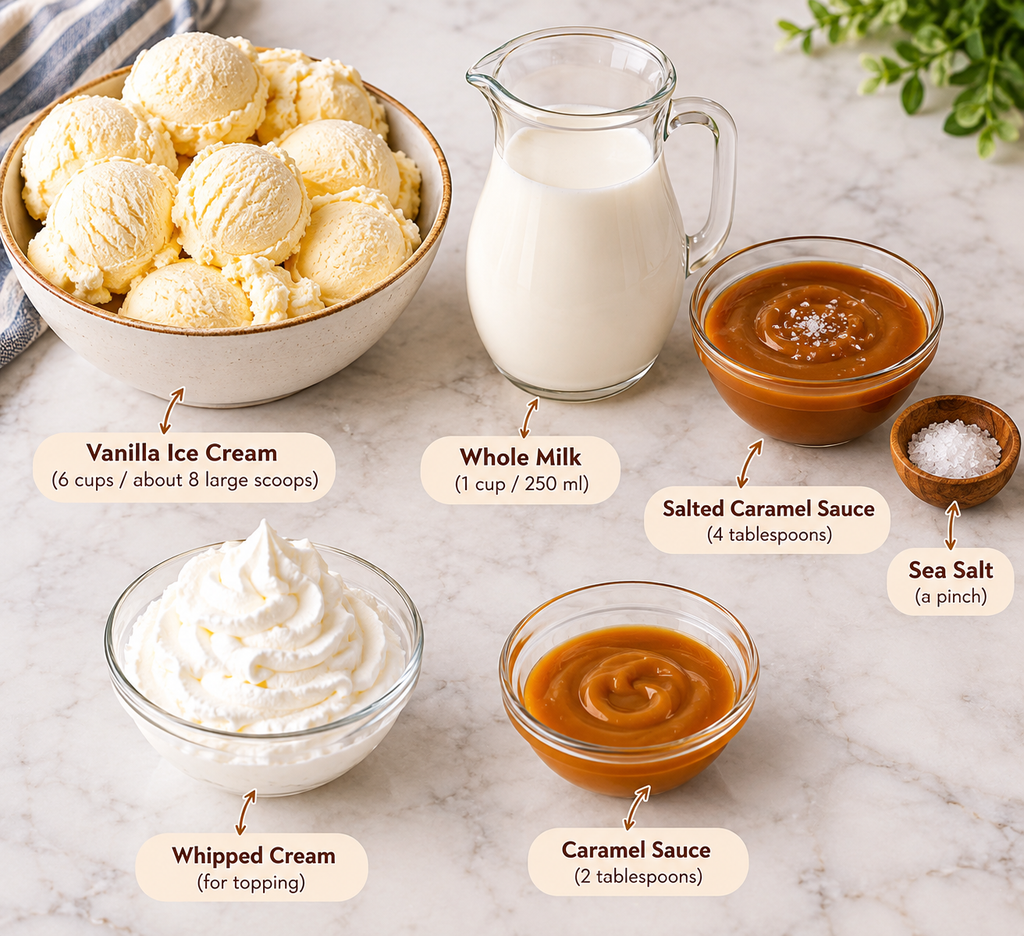
For two large servings, you’ll need:
- 6 cups vanilla ice cream, about 8 large scoops
- 1 cup whole milk, 250 ml
- 4 tablespoons salted caramel sauce
- Pinch of sea salt
- Whipped cream, for topping
- 2 tablespoons caramel sauce, for decorating the glasses
Best Caramel for Salted Caramel Milkshake
You can use homemade salted caramel sauce or a good-quality store-bought sauce. Dulce de leche also works well, although you may want to add a little extra salt because it is usually very sweet.
For the best texture, choose a caramel sauce that is thick but still easy to drizzle.
Choosing Ice Cream and Milk for Salted Caramel Milkshake
Vanilla ice cream is an excellent choice because it lets the caramel remain the main flavor. Whole milk produces a richer, creamier result, but you can use lower-fat milk if preferred.
Equipment Needed for Salted Caramel Milkshake

- High-speed blender
- Measuring cups and spoons
- Two tall milkshake glasses
- Spoon or small spatula for caramel decoration
- Optional: whipped cream dispenser or spray cream
How to Make Salted Caramel Milkshake

- Prepare the glasses. Spoon a little caramel sauce into the bottom of each glass. Drizzle additional caramel around the inside walls for an attractive finish.
- Add the ingredients. Place the vanilla ice cream, whole milk, salted caramel sauce, and sea salt into the blender.
- Blend until smooth. Start blending at very low speed, then increase slowly. Blend just until everything is smooth and creamy. Avoid over-blending because excessive blending can make the milkshake thinner.
- Pour immediately. Divide the milkshake between the prepared glasses.
- Add the toppings. Finish the process by using whipped cream. Add a wafer, caramel fudge, or a light sprinkle of sea salt if desired.
- Serve right away. A freshly blended milkshake has the best texture.
Expert Tips for Salted Caramel Milkshake
A few small details can make a noticeable difference:
- Use slightly softened ice cream. It blends more easily without requiring excess milk.
- Don’t add too much milk. Use the quantity according to the given instructions; don’t use excess.
- Taste before adding more salt. Some caramel sauces already contain salt.
- Use chilled glasses. Place the glasses in the freezer for 10 to 15 minutes before serving for an extra-cold drink.
- Blend briefly. The goal is smooth and thick, not thin and frothy.
- Use quality vanilla ice cream. Since there are only a few ingredients, its flavor is noticeable.
- Drizzle caramel inside the glass. It adds extra caramel flavor as you drink.
Salted Caramel Milkshake Variations
Dairy-Free Salted Caramel Milkshake
Use dairy-free vanilla ice cream. Coconut, oat, or almond milk can work well, depending on the flavor you prefer. Make sure the caramel sauce is also dairy-free.
Boozy Salted Caramel Milkshake
For an adults-only version, blend in a small splash of vodka. Vanilla or caramel-flavored vodka can complement the drink particularly well.
Churro-Inspired Salted Caramel Milkshake
Add a small pinch of ground cinnamon to the blender and use dulce de leche instead of regular caramel sauce. Finish with cinnamon sugar for a warm, churro-inspired flavor.
Serving Suggestions for Salted Caramel Milkshake
This milkshake pairs especially well with classic comfort foods and desserts. Serve it with:
- Burgers and fries
- Chocolate chip cookies
- Brownies
- Caramel or chocolate cake
- Waffles or pancakes
- Fresh fruit for a lighter contrast
For a fun dessert-shop presentation, top each glass with whipped cream, caramel drizzle, a wafer, and a small piece of salted caramel fudge.
Storage & Reheating for Salted Caramel Milkshake
A milkshake is best enjoyed immediately because the ice cream begins melting as soon as it is blended.
If necessary, you can store the blended milkshake in a sealed freezer-safe container. Let it sit at room temperature briefly before serving, then stir or blend again to restore a smoother consistency.
Do not leave a milkshake sitting at room temperature for an extended period.
Common Salted Caramel Milkshake Mistakes to Avoid
- Adding too much milk: This can turn a thick shake into a thin drink.
- Over-blending: Long blending can soften the ice cream too much.
- Using too much caramel: Excess caramel may make the drink extremely sweet.
- Adding salt without tasting: Caramel sauces vary in saltiness.
- Skipping the quality ice cream: The ice cream provides most of the body and creaminess.
- Adding toppings too early: Whipped cream and decorative toppings are best added just before serving.
Salted Caramel Milkshake FAQs
Can I Make Salted Caramel Milkshake Without a Blender?
Yes. Add the ingredients to a large bowl and use a handheld electric mixer. You can also use a cocktail shaker if it is large enough, although the result may not be quite as smooth as a blender-made milkshake.
Can I Make Salted Caramel Milkshake Without Ice Cream?
Yes. The texture will be thinner, but you can use additional chilled milk and ice cubes. A little vanilla extract or sugar can help replace some of the flavor and sweetness provided by the ice cream.
How Do I Make a Salted Caramel Milkshake Thicker?
Use plenty of ice cream and avoid adding excess milk. You can also chill your glasses before serving and blend only until the ingredients are combined and smooth.
Can I Use Dulce de Leche Instead of Caramel Sauce?
Absolutely. Dulce de leche gives the milkshake a deep caramel flavor and creamy consistency. Since it can be quite sweet, balance it with a small pinch of sea salt.
Can I Make This Salted Caramel Milkshake Ahead of Time?
It is best served fresh, but you can blend it ahead and freeze it briefly. Allow it to soften before serving, then stir or blend again if needed.
Salted Caramel Milkshake Nutrition Information (Approximate)
Per serving, the nutrition will vary depending on the ice cream, milk, caramel sauce, and toppings used. A generous serving with whipped cream and caramel can contain approximately:
- Calories: 550–650
- Fat: 25–30g
- Saturated fat: 15–18g
- Carbohydrates: 75–85g
- Sugar: 60–70g
- Protein: 10–12g
- Sodium: 250–400mg
These figures are estimates and should be recalculated using the exact brands and quantities used.
Salted Caramel Milkshake Recipe Card

Yield: 2 large milkshakes
Prep Time: 5 minutes
Total Time: 5 minutes
Category: Dessert Drink
Cuisine: American-inspired
Ingredients
- 6 cups vanilla ice cream
- 1 cup whole milk
- 4 tablespoons salted caramel sauce
- Pinch of sea salt
- Whipped cream, for topping
- 2 tablespoons caramel sauce, for the glasses
Instructions
- Drizzle caramel sauce inside two tall glasses.
- Add vanilla ice cream, milk, salted caramel sauce, and sea salt to a blender.
- Blend until smooth and creamy.
- Pour into the prepared glasses.
- Top with whipped cream and extra caramel sauce.
- Add optional wafers, caramel fudge, or sprinkles.
- Serve immediately.
Conclusion: Salted Caramel Milkshake
This Salted Caramel Milkshake proves that an impressive dessert doesn’t have to take much time. Creamy vanilla ice cream, rich caramel, cold milk, and a touch of sea salt create a simple combination that feels indulgent without complicated preparation.
Keep the milkshake thick, adjust the caramel to your taste, and have fun with the toppings. Whether you serve it alongside burgers and fries or enjoy it as an afternoon dessert, this five-minute treat is an easy way to satisfy a sweet-and-salty craving.

Chicken Noodles Soup: An Easy Homemade Recipe

Easy Chicken Pot Pie Soup Recipe (Creamy And Hearty)

Pineapple Coconut Smoothie Recipe: Creamy And Delicious

Best Butter Chicken Recipe : Creamy And Authentic

Chocolate Dessert Recipes: Rich And Delicious

The Best Homemade BBQ Chicken Pizza Recipe 2026

Simple Fried Chicken Recipe: Crispy, Juicy, and Easy

Healthy Chicken Soup Recipe With Vegetables and Tender Chicken

Chicken Biryani Recipe: Flavorful and Easy to Make

Classic Chicken Salad Recipe – Creamy, Flavorful And Delicious
-
 Baked Chicken4 weeks ago
The Best Homemade BBQ Chicken Pizza Recipe 2026
-
 Chicken Recipes4 weeks ago
Simple Fried Chicken Recipe: Crispy, Juicy, and Easy
-
 Soups and Salad4 weeks ago
Healthy Chicken Soup Recipe With Vegetables and Tender Chicken
-
 Chicken Recipes3 weeks ago
Chicken Biryani Recipe: Flavorful and Easy to Make
-
 Soups and Salad3 weeks ago
Classic Chicken Salad Recipe – Creamy, Flavorful And Delicious
-

 Soups and Salad2 weeks ago
Homemade Cream of Chicken Soup Recipe 2026
-

 Fried Chicken4 weeks ago
Gluten-Free Chicken Nuggets Crispy And Homemade
-

 Chicken Recipes4 weeks ago
Air Fryer Chicken Wings with Crispy, Juicy, and Delicious