
Desserts
Chocolate Dessert Recipes: Rich And Delicious


Introduction
Chocolate desserts are hard to resist, especially when they are rich, creamy, and easy to make at home. Whether you want a quick treat after dinner or a dessert for a special gathering, simple chocolate dessert recipes can turn everyday ingredients into something delicious.
This easy chocolate dessert combines a smooth, rich chocolate mixture with a soft and creamy texture. It uses common ingredients such as chocolate, cocoa powder, cream, butter, and sugar. You can serve it on its own or dress it up with berries, whipped cream, nuts, or chocolate shavings.
Why You’ll Love This Recipe
There are plenty of reasons to keep this chocolate dessert recipe in your collection:
- Easy to make: The preparation uses simple techniques and basic kitchen equipment.
- Rich chocolate flavor: Chocolate and cocoa powder create a deeper flavor.
- Simple ingredients: Most ingredients are easy to find.
- Customizable: Add nuts, berries, caramel, or whipped cream.
- Great for guests: Individual servings can make this simple dessert look elegant.
- Make-ahead friendly: It can be prepared in advance and chilled until ready to serve.
Ingredients For Chocolate Dessert
This recipe makes approximately 6 servings.
Main Ingredients
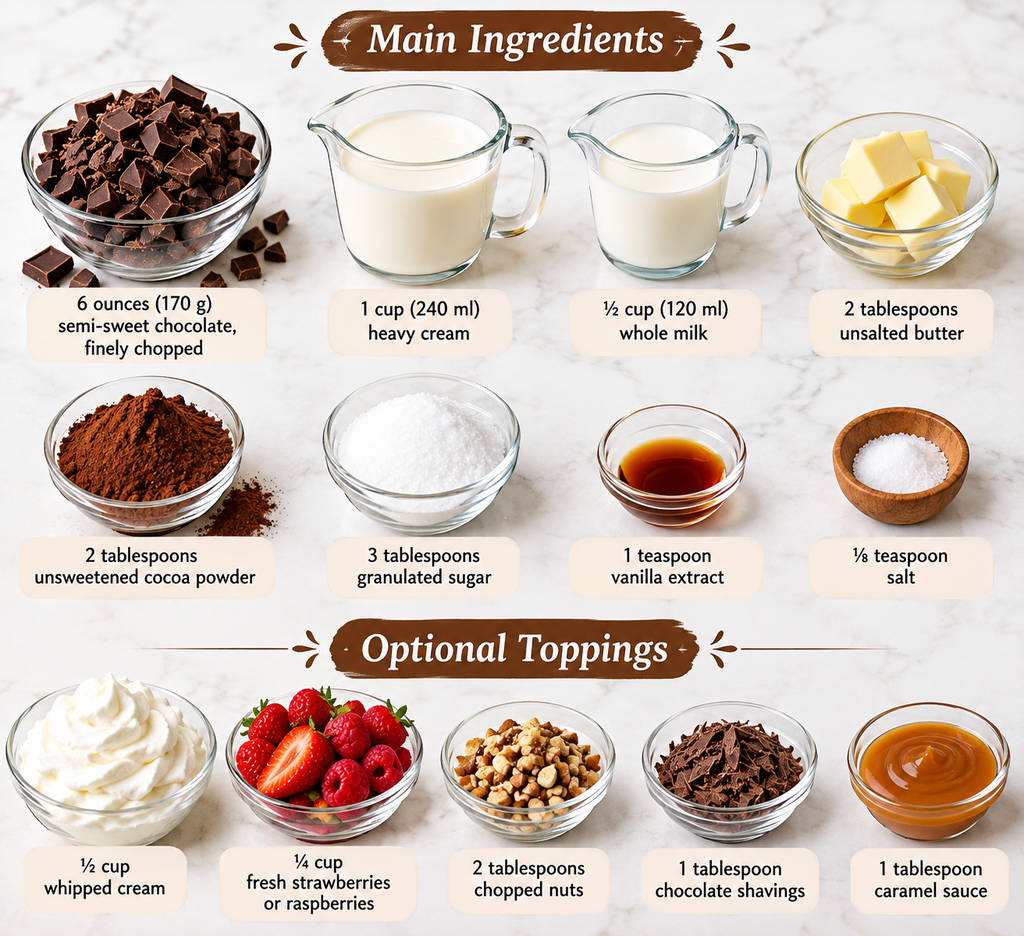
- 6 ounces (170 g) semi-sweet chocolate, finely chopped
- 1 cup (240 ml) heavy cream
- ½ cup (120 ml) whole milk
- 2 tablespoons unsalted butter
- 2 tablespoons unsweetened cocoa powder
- 3 tablespoons granulated sugar
- 1 teaspoon vanilla extract
- ⅛ teaspoon salt
Optional Toppings
- ½ cup whipped cream
- ¼ cup fresh strawberries or raspberries
- 2 tablespoons chopped nuts
- 1 tablespoon chocolate shavings
- 1 tablespoon caramel sauce
Use good-quality chocolate for the best flavor. Semi-sweet chocolate provides a nice balance, but dark chocolate can be used if you prefer a more intense taste.
Equipment Needed For Chocolate Dessert
You only need a few basic tools:
- Medium saucepan
- Heatproof mixing bowl
- Whisk
- Rubber spatula
- Measuring cups and spoons
- Six small serving glasses or dessert cups
- Refrigerator
Step-by-Step Instructions For Chocolate Dessert
1. Prepare the Chocolate
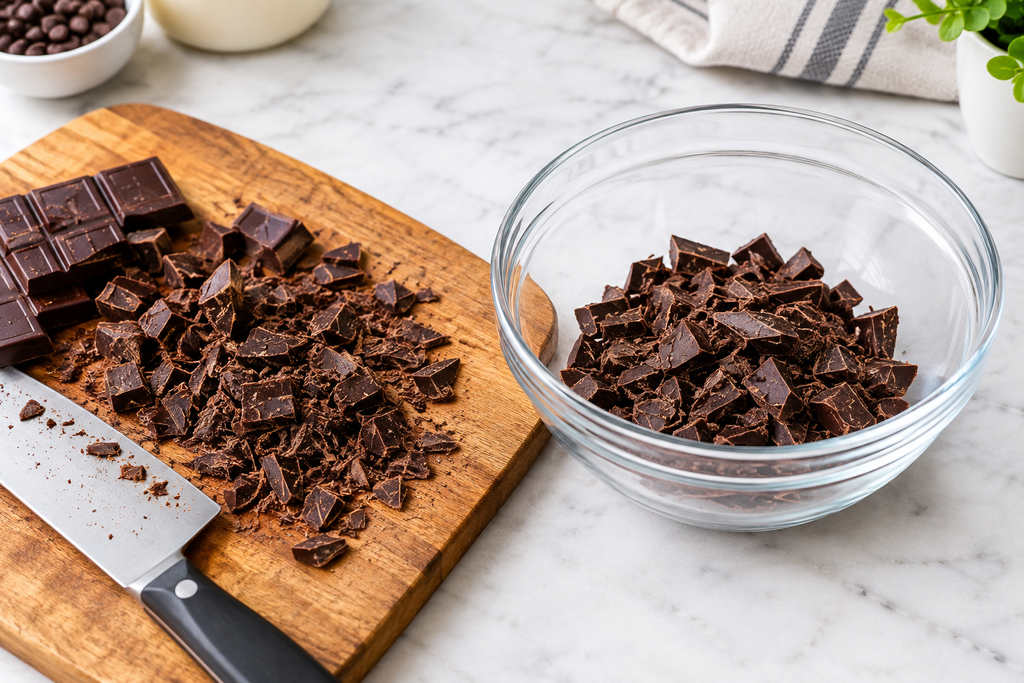
Chop the chocolate finely and put it in a bowl that can withstand heat. Smaller pieces melt more evenly and quickly.
Set the bowl aside while you prepare the warm cream mixture.
2. Heat the Cream and Milk
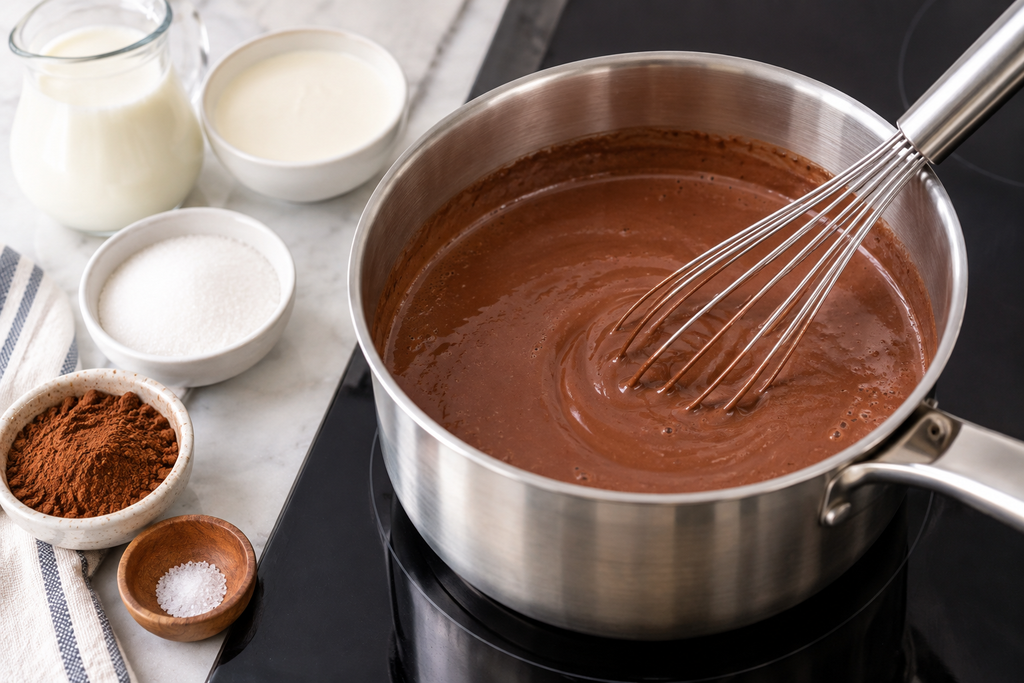
Add the heavy cream, milk, sugar, cocoa powder, and salt to a medium saucepan.
Warm the mixture over medium-low heat, whisking frequently. Do not let it come to a full boil. Heat it until the sugar dissolves and the mixture is hot and smooth.
3. Melt the Chocolate
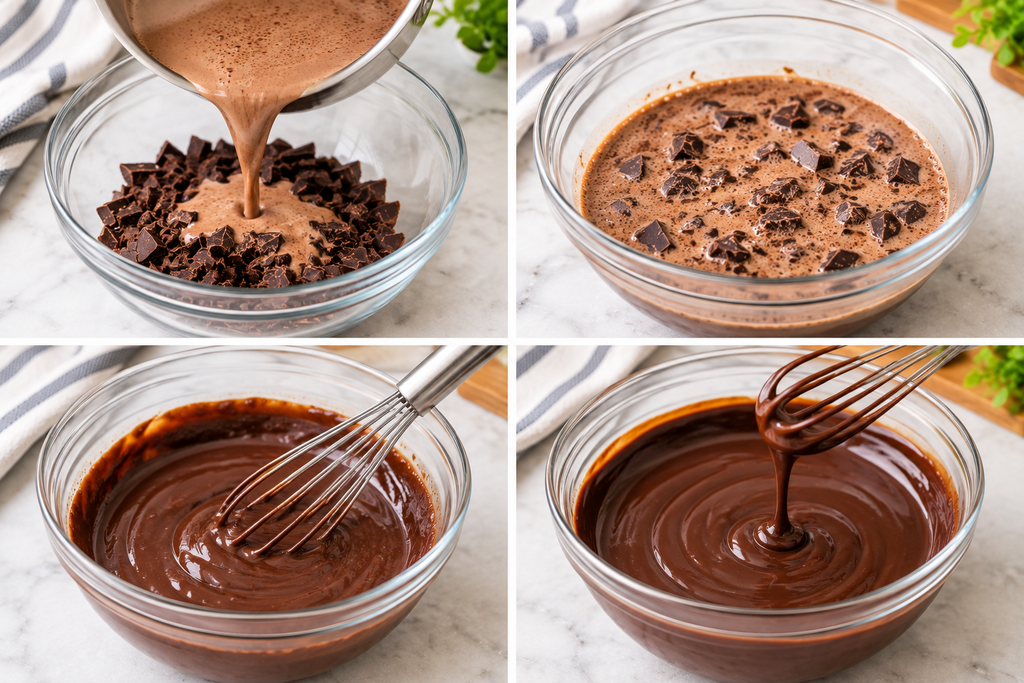
Now put all the melting chocolate into the chopped chocolate. Let it sit for about 2 minutes.
Whisk gently until the chocolate has completely melted and the mixture becomes smooth and glossy.
4. Add Butter and Vanilla
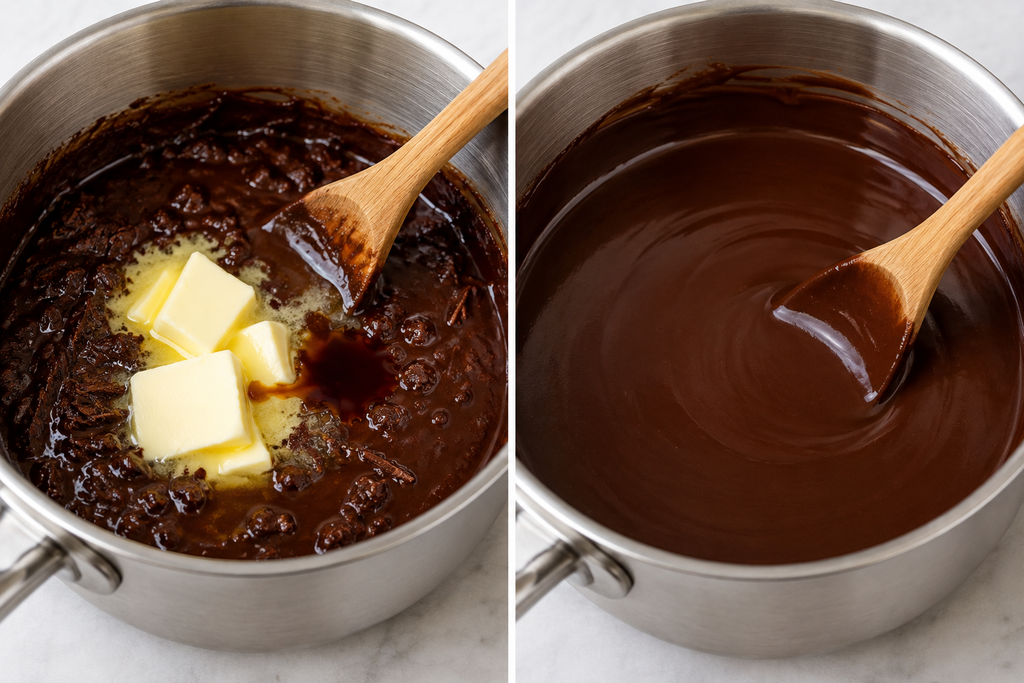
Add the butter and vanilla extract. Stir until the butter melts completely and blends into the chocolate mixture.
The finished mixture should look smooth without visible pieces of chocolate or butter.
5. Portion the Dessert
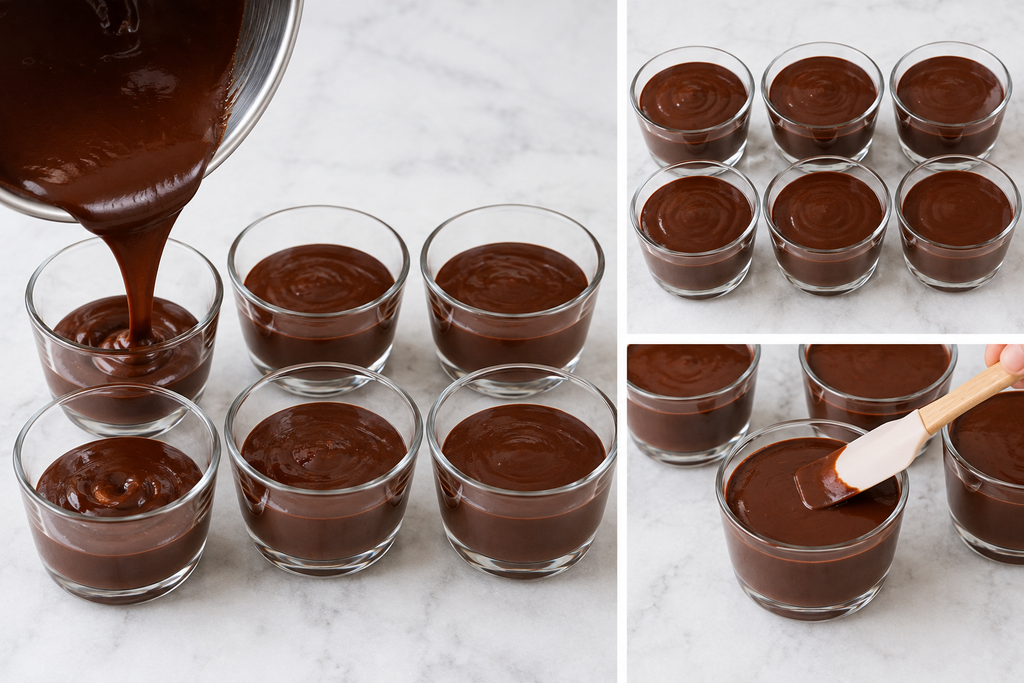
Divide the chocolate mixture evenly between six small serving glasses or dessert cups.
Use a spoon or spatula to smooth the tops if needed.
6. Chill
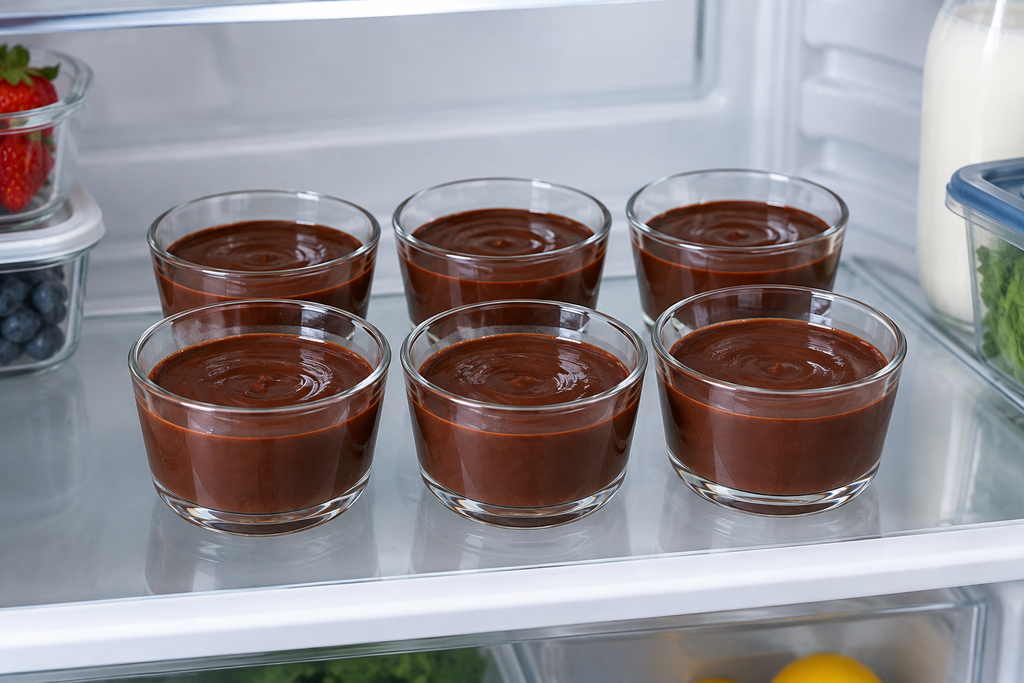
Place the desserts in the refrigerator for at least 1–2 hours, or until they have set to your preferred consistency.
For a firmer texture, chill them for several hours.
7. Add Toppings and Serve
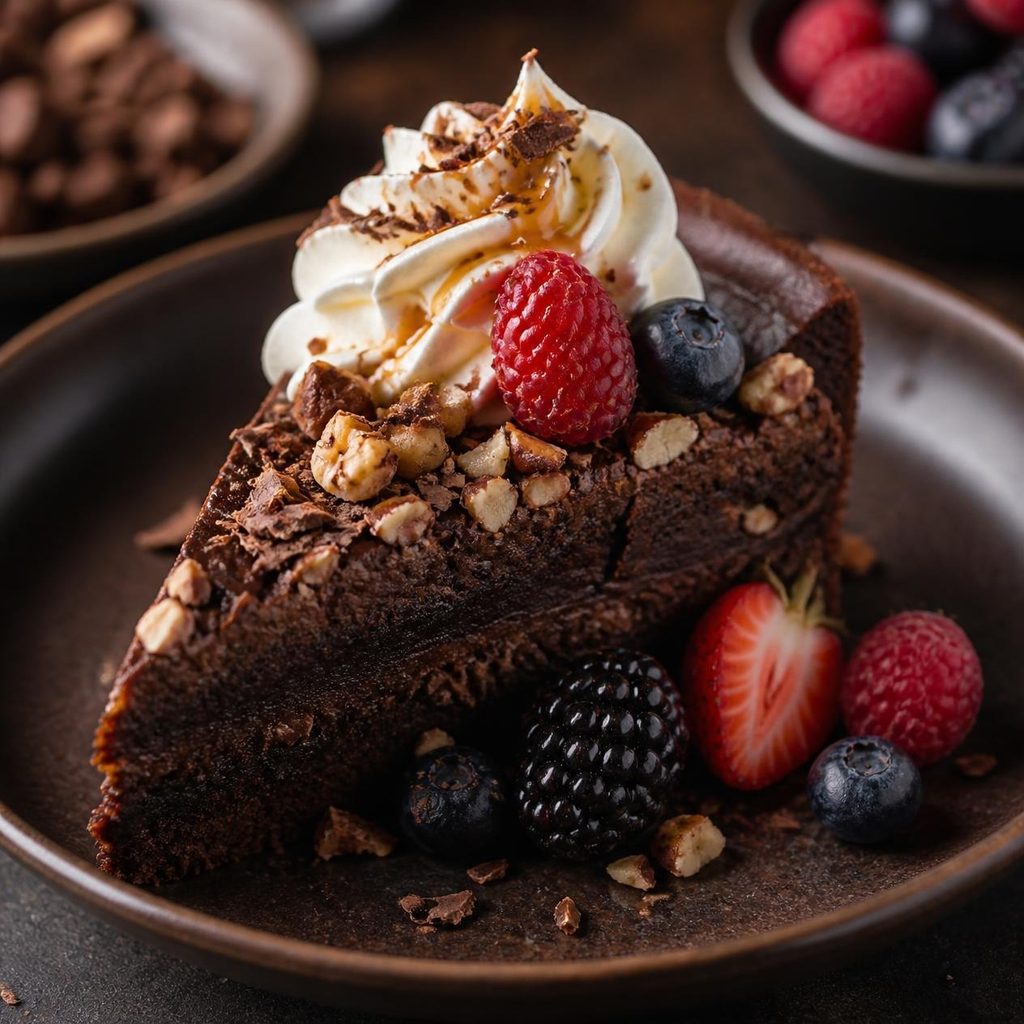
Just before serving, add whipped cream, fresh berries, chopped nuts, chocolate shavings, or a small drizzle of caramel sauce.
Keep the toppings simple so they do not overpower the chocolate flavor.
Expert Tips For Chocolate Dessert
- Use finely chopped chocolate so it melts evenly.
- Keep the cream mixture below a boil. Excessive heat can affect the texture.
- Whisk gently after adding the chocolate to create a smooth mixture.
- Use room-temperature butter so it blends more easily.
- Do not skip chilling. The dessert needs enough time to develop its final texture.
- Taste before adding extra sugar. Different chocolate brands have different sweetness levels.
- For a stronger chocolate flavor, use dark chocolate with 60–70% cocoa.
Recipe Variations
Dark Chocolate Dessert
Replace the semi-sweet chocolate with 6 ounces of dark chocolate for a deeper, less sweet flavor.
Chocolate Berry Dessert
Add fresh raspberries or strawberries before serving. Their natural tartness balances the richness of chocolate.
Chocolate Nut Dessert
Sprinkle 2–3 tablespoons of toasted chopped almonds, walnuts, or hazelnuts over each serving.
Mocha Chocolate Dessert
Add 1 teaspoon instant espresso powder to the warm cream mixture. Coffee enhances the chocolate flavor without making the dessert taste strongly like coffee.
Peanut Butter Chocolate Dessert
Swirl 2 tablespoons smooth peanut butter into the chocolate mixture before portioning it into serving glasses.
Serving Suggestions
Serve this dessert chilled with a simple topping. Whipped cream and fresh berries are classic choices, but you can also add:
- Chocolate curls
- Toasted nuts
- Caramel sauce
- Fresh strawberries
- Raspberries
- Vanilla ice cream
- A light dusting of cocoa powder
For parties, use small glass cups and prepare individual portions ahead of time.
Storage & Reheating
Cover the dessert cups and refrigerate for up to 3 days.
Because this is a chilled chocolate dessert, reheating is not recommended. Keep it refrigerated until about 5–10 minutes before serving so the texture softens slightly.
If using fresh fruit or whipped cream, add them shortly before serving for the best appearance and texture.
Common Mistakes to Avoid
- Boiling the cream: Keep the heat moderate to prevent the mixture from becoming unpleasantly thick or affecting the chocolate.
- Using large chocolate pieces: They may not melt evenly.
- Skipping the resting time: Give the chocolate mixture a couple of minutes to soften before whisking.
- Serving too soon: Chilling is important for the final consistency.
- Adding too many toppings: Excess toppings can overwhelm the main chocolate flavor.
- Using very sweet chocolate with extra sugar: Taste and adjust the sweetness when appropriate.
Frequently Asked Questions
What chocolate is best for chocolate dessert recipes?
Semi-sweet chocolate is a versatile choice because it provides a balanced sweetness. Dark chocolate works well if you prefer a richer and less sweet dessert.
Can I make this dessert without cocoa powder?
Yes. You can omit the cocoa powder, although the chocolate flavor will be slightly different. Using good-quality chocolate will still give you a rich result.
Can I make this chocolate dessert ahead of time?
Yes. Prepare it up to 3 days in advance and store it covered in the fridge. Add fresh toppings just before serving.
How do I make the dessert more chocolatey?
Use dark chocolate with a higher cocoa percentage or add an extra tablespoon of cocoa powder. The flavor of the chocolate can also be improved by a tiny bit of espresso powder.
Can I use milk chocolate?
Yes, but milk chocolate is sweeter than semi-sweet or dark chocolate. If using it, you may want to reduce the added sugar.
Nutrition Information (Approximate)
The following estimate is based on 6 servings without optional toppings:
- Calories: 390 kcal
- Carbohydrates: 30 g
- Protein: 5 g
- Fat: 29 g
- Saturated Fat: 17 g
- Sugar: 23 g
- Fiber: 3 g
- Sodium: 70 mg
Actual nutrition will vary depending on the chocolate, cream, milk, and toppings used.
Recipe Card (Printable Summary)
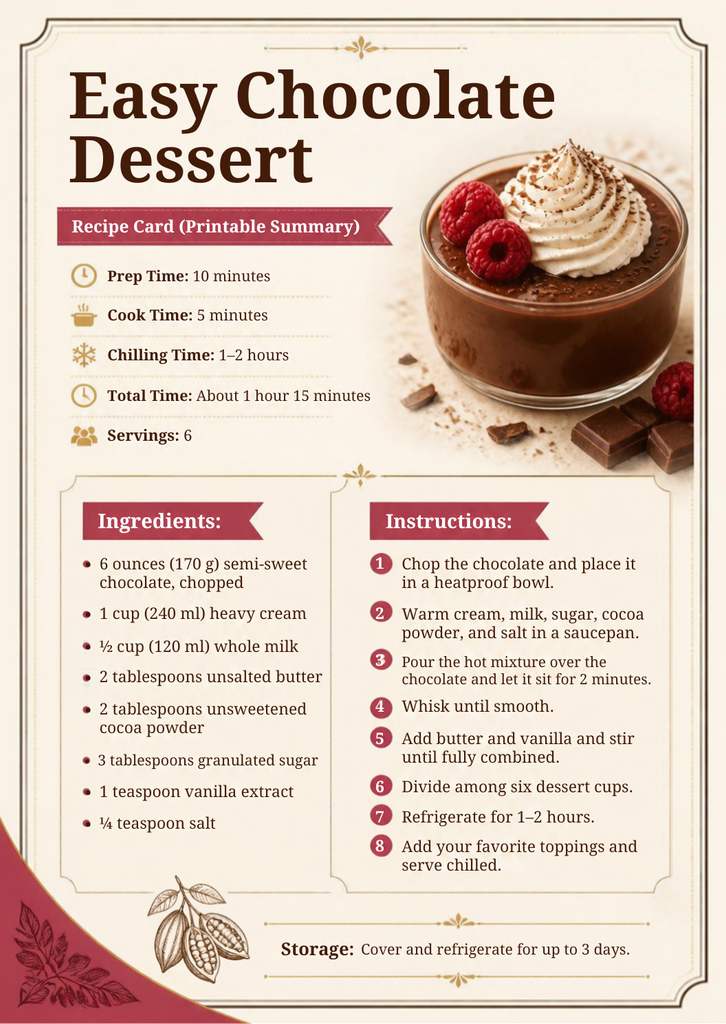
Chocolate Dessert Recipe
Prep Time: 10 minutes
Cook Time: 5 minutes
Chilling Time: 1–2 hours
Total Time: About 1 hour 15 minutes
Servings: 6
Ingredients:
- 6 ounces (170 g) semi-sweet chocolate, chopped
- 1 cup (240 ml) heavy cream
- ½ cup (120 ml) whole milk
- 2 tablespoons unsalted butter
- 2 tablespoons unsweetened cocoa powder
- 3 tablespoons granulated sugar
- 1 teaspoon vanilla extract
- ⅛ teaspoon salt
Instructions:
- Chop the chocolate and place it in a heatproof bowl.
- Warm the cream, milk, sugar, cocoa powder, and salt in a saucepan.
- After adding the heated mixture to the chocolate, let it sit for 2 minutes.
- Whisk until smooth.
- Add butter and vanilla and stir until fully combined.
- Divide among six dessert cups.
- Refrigerate for 1–2 hours.
- Add your favorite toppings and serve chilled.
Conclusion
These chocolate dessert recipes are a great starting point when you want something rich, creamy, and easy to prepare. You do not need to spend hours in the kitchen to make a dessert that seems great with just a few ingredients.
Keep the basic recipe simple, then experiment with dark chocolate, berries, nuts, peanut butter, or coffee to create your own favorite version. Whether you are serving it after a family dinner or preparing it for guests, this chocolate dessert is an easy sweet treat worth making.

These keto brownie recipes are rich, chocolatey, and wonderfully fudgy without relying on regular flour or sugar. They are made with simple low-carb ingredients, so you can enjoy a satisfying chocolate dessert while keeping carbohydrates much lower than in traditional brownies.
The key to a great brownie is texture. The edges should get a little chewy, but the middle should remain soft and fudgy. After testing this style of brownie in the kitchen, I find that using unsweetened cocoa powder, almond flour, melted butter, and a suitable keto sweetener gives the best balance of chocolate flavor and tenderness.
Why You’ll Love This Keto Brownies Recipe
- Low in carbs: A useful alternative to traditional sugar-filled brownies.
- Rich chocolate flavor: Cocoa powder and optional chocolate chips make every bite deeply chocolaty.
- Fudgy texture: When brownies are not overbaked, the center remains soft.
- Simple ingredients: Most items are easy to find.
- Quick preparation: It takes around ten minutes to prepare the batter.
- Easy to customize: Add nuts, sugar-free chocolate chips, or a little espresso powder.
Ingredients For Keto Brownies Recipe
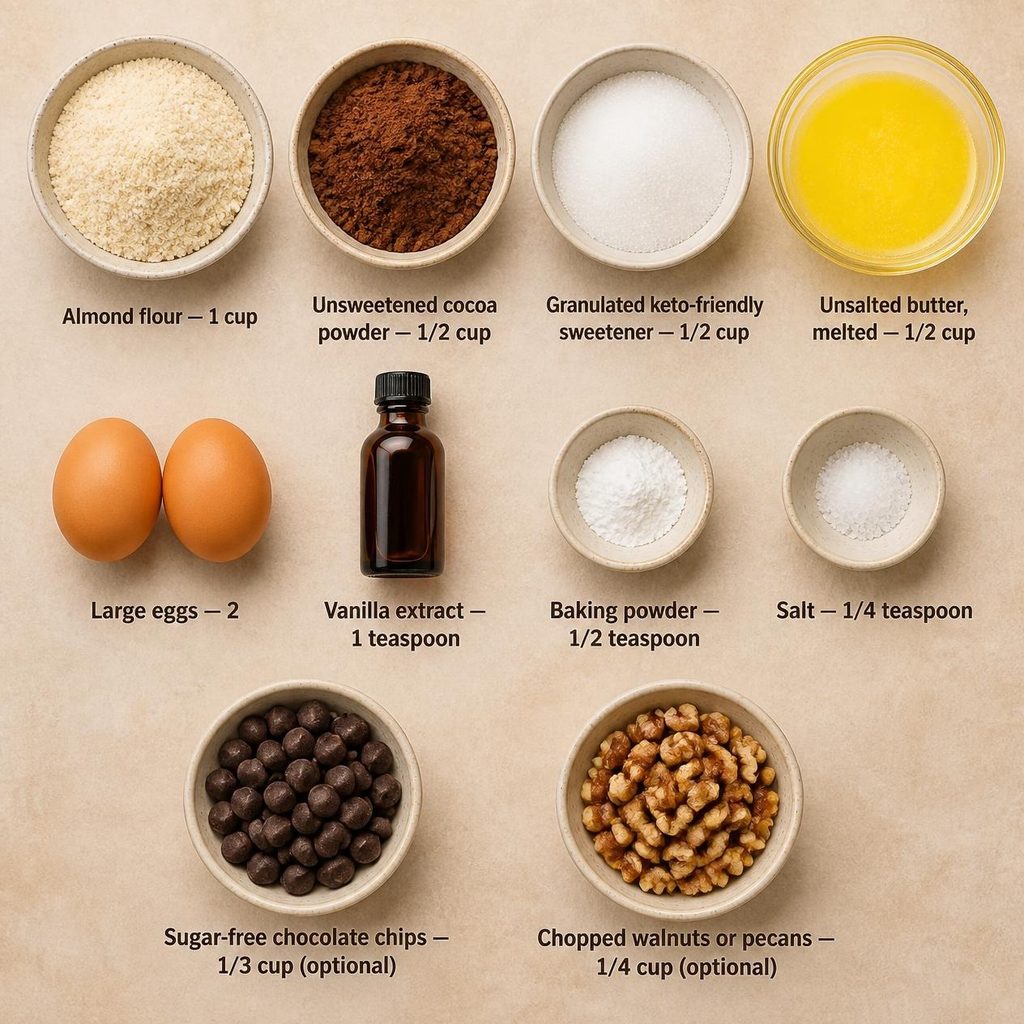
- 1 cup almond flour
- 1/2 cup unsweetened cocoa powder
- 1/2 cup granulated keto-friendly sweetener, such as erythritol or monk fruit blend
- 1/2 cup unsalted butter, melted
- 2 large eggs
- 1 teaspoon vanilla extract
- 1/2 teaspoon baking powder
- 1/4 teaspoon salt
- 1/3 cup sugar-free chocolate chips, optional
- 1/4 cup chopped walnuts or pecans, optional
Ingredient Notes for Keto Brownies Recipe
Use fine almond flour rather than coarse almond meal for a smoother brownie texture. Choose unsweetened cocoa powder because the sweetener provides the necessary sweetness.
Different keto sweeteners vary in sweetness and texture. If using a blend, follow the manufacturer’s conversion guidelines. Powdered sweetener can also help produce a smoother batter.
Equipment Needed for Keto Brownies Recipe
- 8-inch square baking pan
- Mixing bowl
- Whisk
- Rubber spatula
- Measuring cups and spoons
- Parchment paper
- Wire cooling rack
Step-by-Step Instructions for Making Keto Brownies Recipe
Prepare the oven and pan.
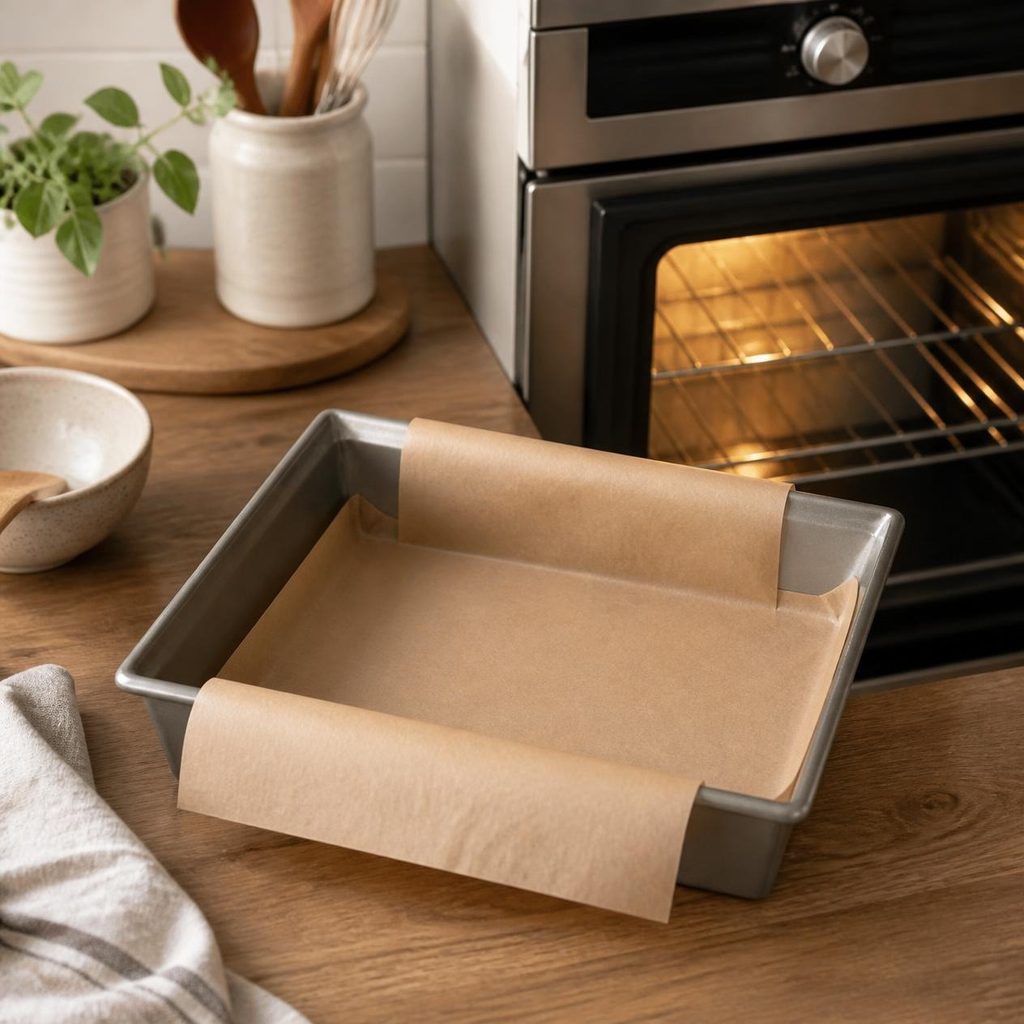
Preheat the oven to 350°F (175°C). Line an 8-inch square baking pan with parchment paper, leaving some overhang for easy removal.
Combine the dry ingredients.
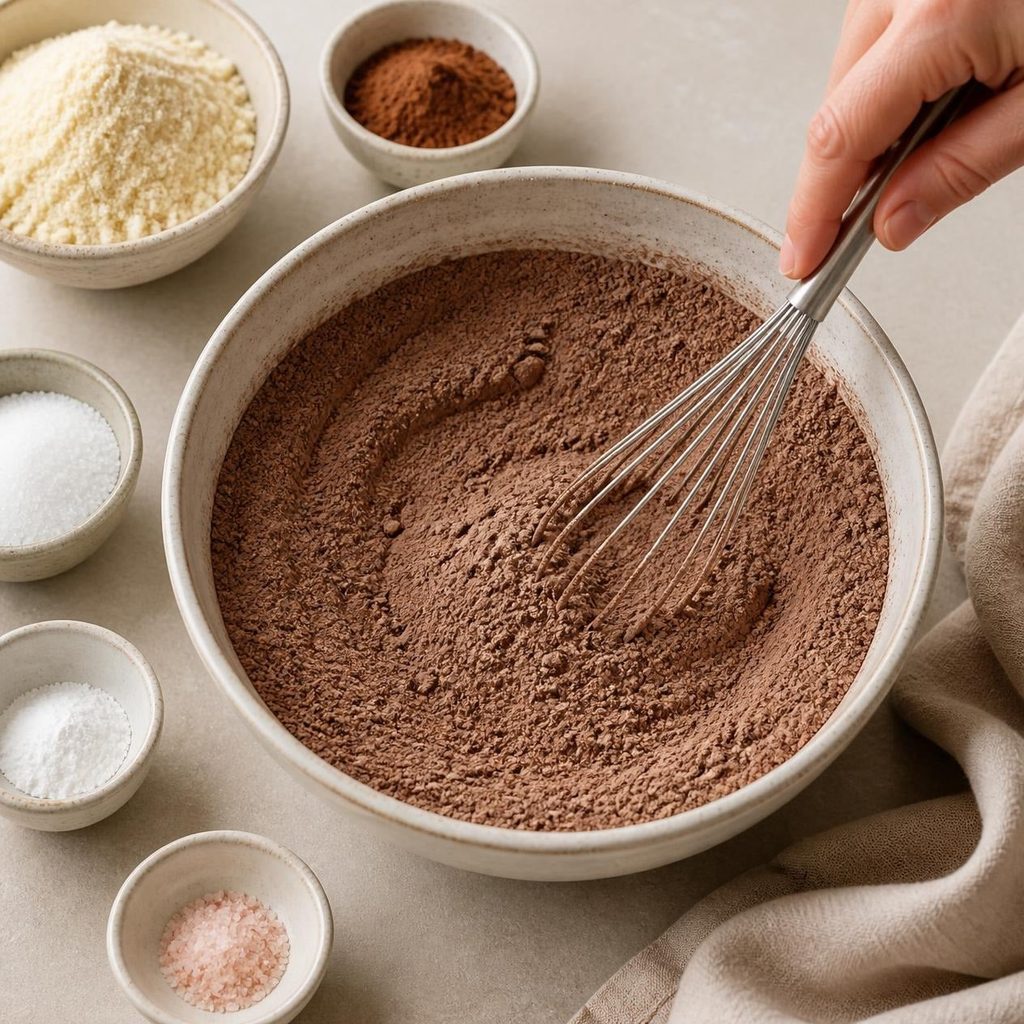
Add almond flour, cocoa powder, keto sweetener, baking powder, and salt to a bowl. Whisk until evenly combined and break up any cocoa lumps.
Mix the wet ingredients.

Beat the eggs, vanilla extract, and melted butter together in a separate dish until creamy.
Add extras.
If using chopped walnuts or sugar-free chocolate chips, fold them in.
Make the batter.
Pour the wet mixture into the dry ingredients. Gently mix with a rubber spatula just until combined, and the flour pockets disappear. Avoid overmixing.
Bake.
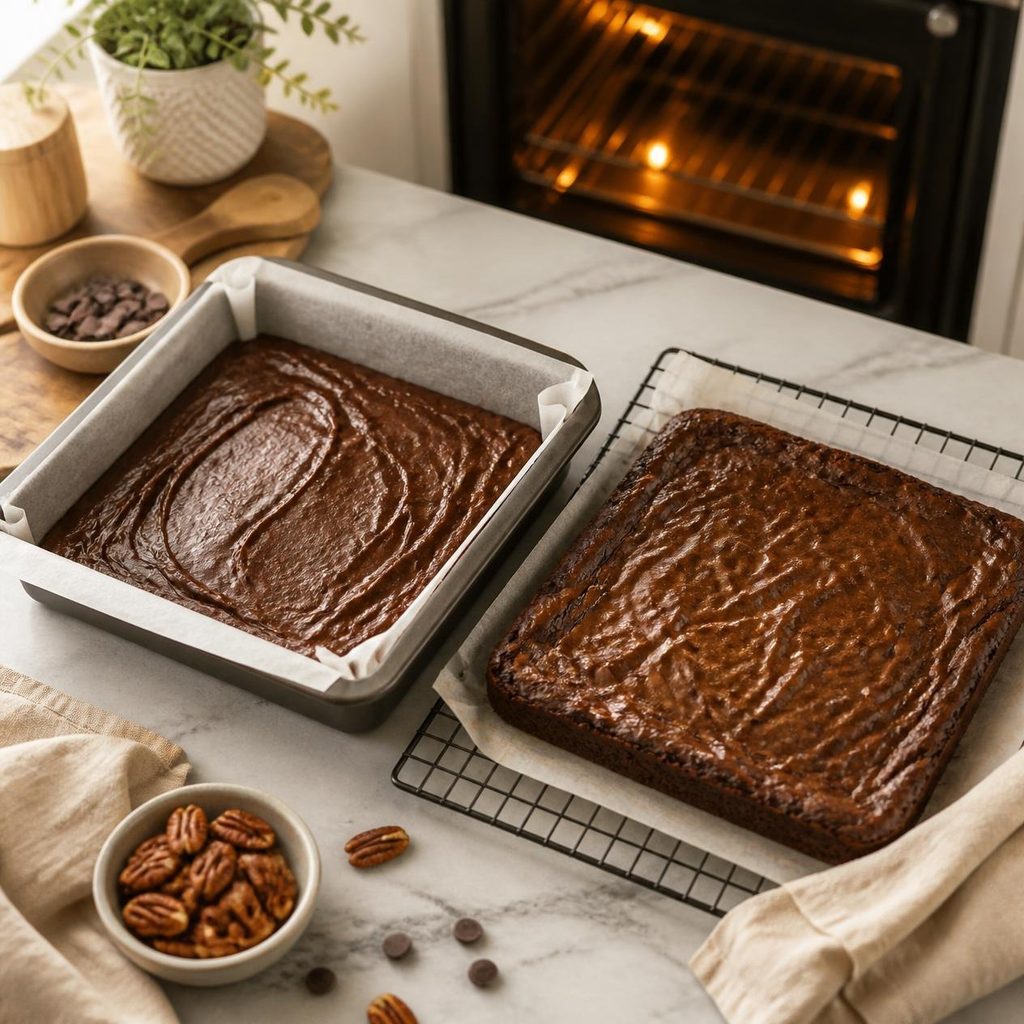
Spread the batter evenly into the prepared pan. Bake for approximately 18–23 minutes. The center should be slightly mushy, but the edges should appear set. Cool completely.

Before slicing, let the brownies cool in the pan. For especially clean cuts and a firmer fudgy texture, chill them briefly before serving.
Expert Tips for Keto Brownies Recipe
- Don’t overbake. The most crucial piece of advice for fudgy brownies is this. When you take them out of the oven, the middle should still be slightly soft.
- Measure almond flour carefully. Brownies made with too much flour may become crumbly and dry.
- Let them cool. Keto brownies often become firmer as they cool.
- Use good-quality cocoa powder. Since chocolate is the main flavor, better cocoa can make a noticeable difference.
- Add espresso powder for depth. About 1/2 teaspoon can intensify the chocolate flavor without making the brownies taste like coffee.
- Cut with a sharp knife. Wipe the blade between cuts for neat squares.
Recipe Variations for Keto Brownies Recipe
Keto Walnut Brownies
Fold in 1/4 cup chopped walnuts or pecans for a crunchy contrast.
Double Chocolate Keto Brownies
For an even richer, more chocolatey brownie, add 1/3 cup sugar-free chocolate chips.
Peanut Butter Brownies
Swirl 2–3 tablespoons of unsweetened natural peanut butter over the batter before baking.
Dairy-Free Keto Brownies
Replace the butter with melted coconut oil or another suitable dairy-free baking fat.
Serving Suggestions
Serve these brownies by themselves or with:
- Unsweetened whipped cream
- A few fresh berries
- Sugar-free chocolate sauce
- Keto-friendly vanilla ice cream
- A spoonful of natural peanut or almond butter
Serve them at room temperature or slightly cooled for the nicest fudgy texture.
Storage & Reheating
Brownies that have cooled can be kept for up to three days at room temperature in an airtight container. Store them in the refrigerator for up to a week.
You can also freeze individual brownie squares. For up to two or three months, store them in a freezer-safe container after properly wrapping them. Thaw in the refrigerator or at room temperature.
If you prefer warm brownies, microwave one square for about 10–15 seconds. Heat gently because excessive heating can make almond-flour brownies dry.
Common Mistakes to Avoid
- Overbaking the brownies: This is the quickest way to lose the fudgy center.
- Using almond meal: Its coarse texture can make the brownies heavier.
- Adding too much sweetener: Different sweeteners have different sweetness levels and can affect texture.
- Cutting them while hot: Freshly baked brownies are delicate and need time to set.
- Overmixing the batter: Just stir until all of the ingredients are combined.
- Ignoring cocoa quality: Bitter or low-quality cocoa can overpower the other flavors.
Frequently Asked Questions for Keto Brownies Recipe
Are keto brownies actually low carb?
They can be significantly lower in carbohydrates than traditional brownies when made with almond flour and a low- or zero-sugar sweetener. However, the exact carbohydrate content depends on the ingredients and serving size.
Can I use coconut flour instead of almond flour?
Not as a direct 1:1 replacement. Coconut flour absorbs much more liquid, so the recipe would need to be reformulated.
Why are my keto brownie recipes dry?
The most common reason is overbaking. A dry texture might also result from using too much almond flour. When the middle of the brownies is slightly soft, but the borders are set, remove them.
Can I make these brownies without chocolate chips?
Yes. The chocolate chips are optional. The cocoa powder provides the main chocolate flavor.
Which sweetener is best for keto brownies?
Erythritol, monk fruit blends, and other low-carb baking sweeteners can work well. Choose one designed for baking and check its sweetness compared with regular sugar.
Can I make keto brownies ahead of time?
Yes. In fact, the texture can improve after cooling because the brownies become firmer and fudgier.
Can I freeze keto brownies?
Yes. Cool them completely, cut them into portions, wrap them well, and freeze for up to 2–3 months.
How do I get clean brownie slices?
Allow the brownies to cool completely. For very neat slices, refrigerate them first and use a sharp knife, wiping it clean after each cut.
Nutrition Information (Approximate)
Per serving, assuming 12 brownies:
- Calories: 190
- Total Fat: 17g
- Protein: 5g
- Total Carbohydrates: 7g
- Fiber: 3g
- Net Carbohydrates: 4g
- Sugar: 1g
Nutrition values are estimates and can vary depending on the brands and sweeteners used.
Recipe Card (Printable Summary)
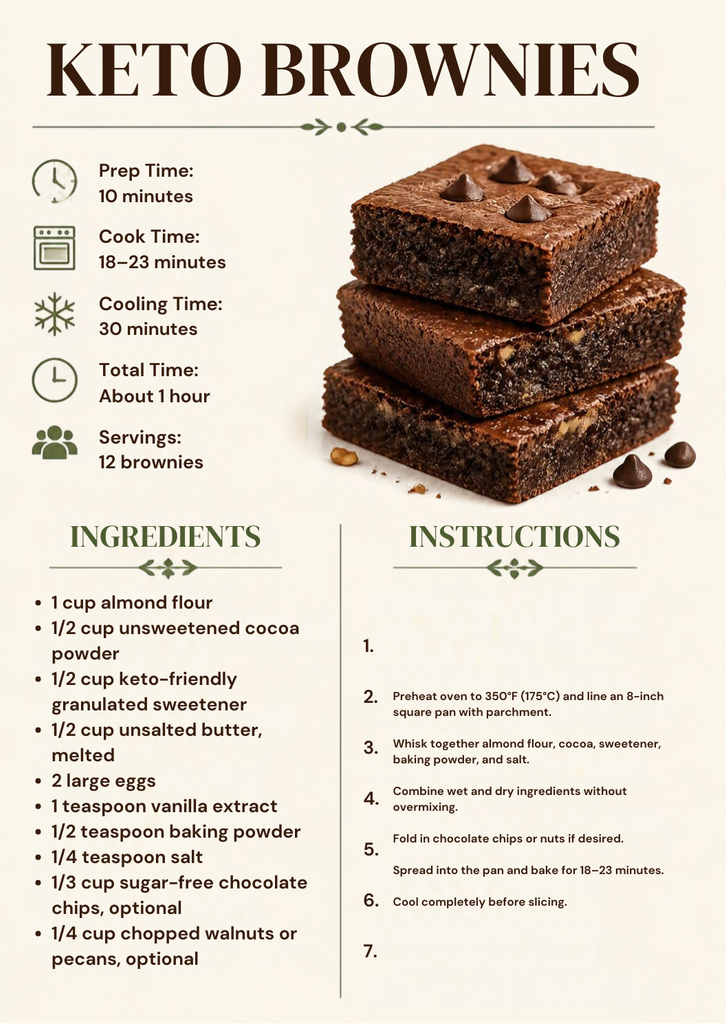
Keto Brownies Recipe
Prep Time: 10 minutes
Cook Time: 18–23 minutes
Cooling Time: 30 minutes
Total Time: About 1 hour
Servings: 12 brownies
Ingredients:
- 1 cup almond flour
- 1/2 cup unsweetened cocoa powder
- 1/2 cup keto-friendly granulated sweetener
- 1/2 cup unsalted butter, melted
- 2 large eggs
- 1 teaspoon vanilla extract
- 1/2 teaspoon baking powder
- 1/4 teaspoon salt
- 1/3 cup sugar-free chocolate chips, optional
- 1/4 cup chopped walnuts or pecans, optional
Instructions:
- Preheat oven to 350°F (175°C) and line an 8-inch square pan with parchment.
- Whisk together almond flour, cocoa, sweetener, baking powder, and salt.
- In another bowl, whisk melted butter, eggs, and vanilla.
- Combine wet and dry ingredients without overmixing.
- Fold in chocolate chips or nuts if desired.
- Spread into the pan and bake for 18–23 minutes.
- Cool completely before slicing.
Conclusion
These keto brownies are an easy way to enjoy a rich chocolate dessert with fewer carbohydrates than conventional brownies. Almond flour keeps the texture tender, while cocoa powder delivers plenty of chocolate flavor. The most important step is simply to avoid overbaking them.
Whether you enjoy them plain, with nuts, or topped with a keto-friendly treat, these brownies make a practical dessert for chocolate lovers looking for a low-carb option.

Chocolate Lava Cakes
Chocolate Lava Cakes are the kind of dessert that feels special without requiring complicated baking skills. The outside is soft and rich, while the center stays warm, glossy, and wonderfully gooey. When you cut into one, the melted chocolate flows onto the plate, making every bite feel like a restaurant-style dessert.
The best part is how quickly these individual cakes come together. You only need a handful of everyday ingredients, a few ramekins, and about 20 to 25 minutes. Serve them warm with vanilla ice cream and fresh berries, or keep things simple with a light dusting of powdered sugar.
Why You’ll Love This Recipe
- Quick to make: These cakes can be ready in about 25 minutes.
- Simple ingredients: You do not need a long shopping list or specialty ingredients.
- No mixer required: A whisk and a couple of bowls are enough.
- Rich chocolate flavor: Butter and chocolate create a deep, satisfying taste.
- Perfect molten center: The short baking time keeps the middle soft and gooey.
- Great for entertaining: Individual cakes look impressive when served warm.
- Easy to customize: Add caramel, peanut butter, berries, or your favorite ice cream.
Ingredients
Main Ingredients
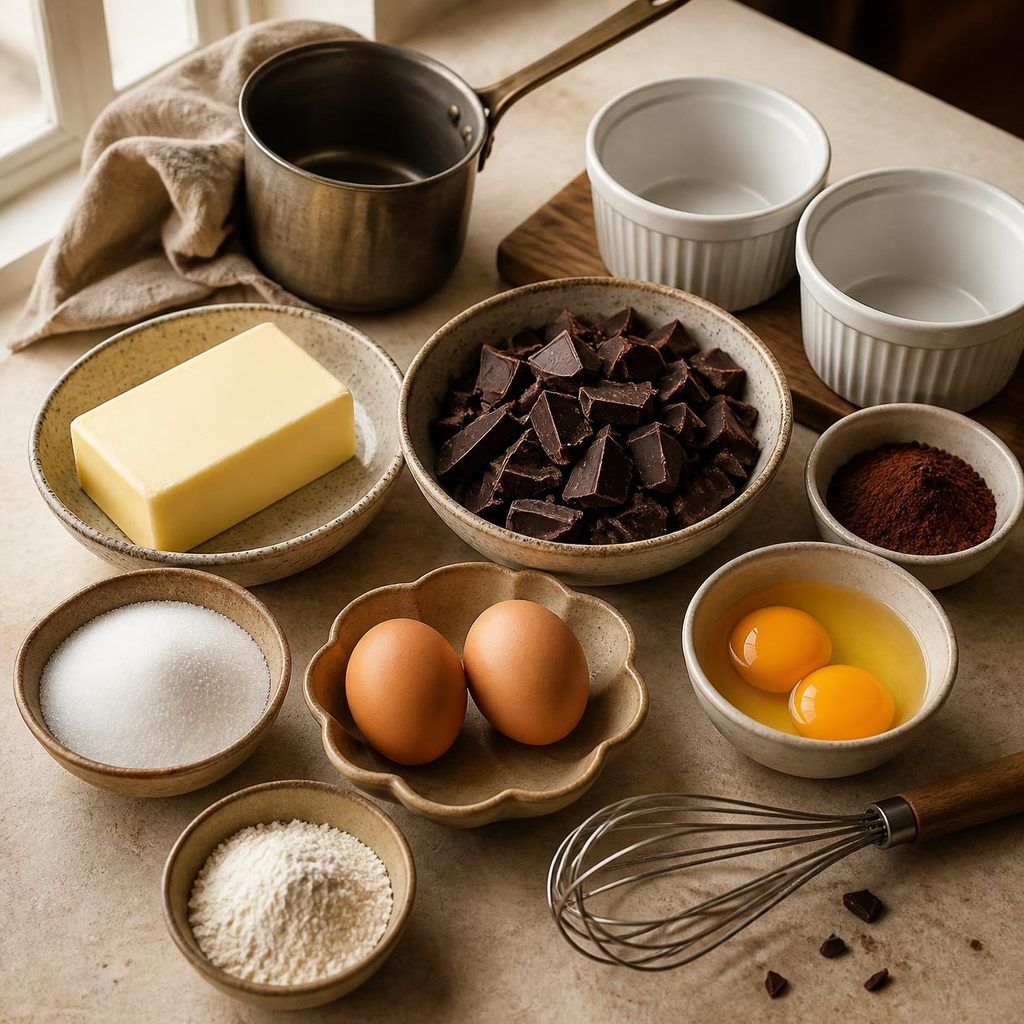
For 4 individual Chocolate Lava Cakes, you will need:
- 1 stick (113g) unsalted butter
- ⅔ cup (113g) semi-sweet or dark chocolate, chopped
- 2 large eggs, preferably at room temperature
- 2 large egg yolks
- ¼ cup (50g) granulated sugar
- 1 tablespoon (8g) all-purpose flour
- Extra granulated sugar or cocoa powder for preparing the ramekins
Ingredient Notes & Substitutions
Chocolate: Semi-sweet chocolate gives the cakes a balanced flavor. Dark chocolate works well if you prefer a deeper, less sweet dessert. Chop the chocolate into small pieces so it melts evenly.
Butter: Unsalted butter is best because it lets you control the amount of salt in the recipe. If you only have salted butter, you can still use it, but avoid adding extra salt.
Eggs and egg yolks: The extra yolks give the cakes a richer texture and help create that soft, custardy center. Room-temperature eggs also combine more smoothly with the melted chocolate.
Flour: Only a small amount is needed. It gives the cake enough structure to hold its shape without turning the center into a fully baked crumb.
Gluten-free option: You can replace the all-purpose flour with a suitable gluten-free flour blend. Since the recipe contains very little flour, the substitution is straightforward.
Ramekin coating: Sugar creates a delicate crust around the outside of the cake. You can also use cocoa powder if you prefer a less noticeable coating.
Equipment Needed
Equipment you need for making the chocolate lava cake recipe:
- 4 small oven-safe ramekins
- Small saucepan
- Medium mixing bowl
- Whisk
- Rubber spatula
- Baking sheet
- Measuring cups and spoons
- Kitchen scale, if available
- Oven mitts or a thick potholder
A kitchen scale is particularly useful when measuring chocolate and flour. Small differences in flour can affect the final texture.
Step-by-Step Instructions
1. Prepare the Ramekins
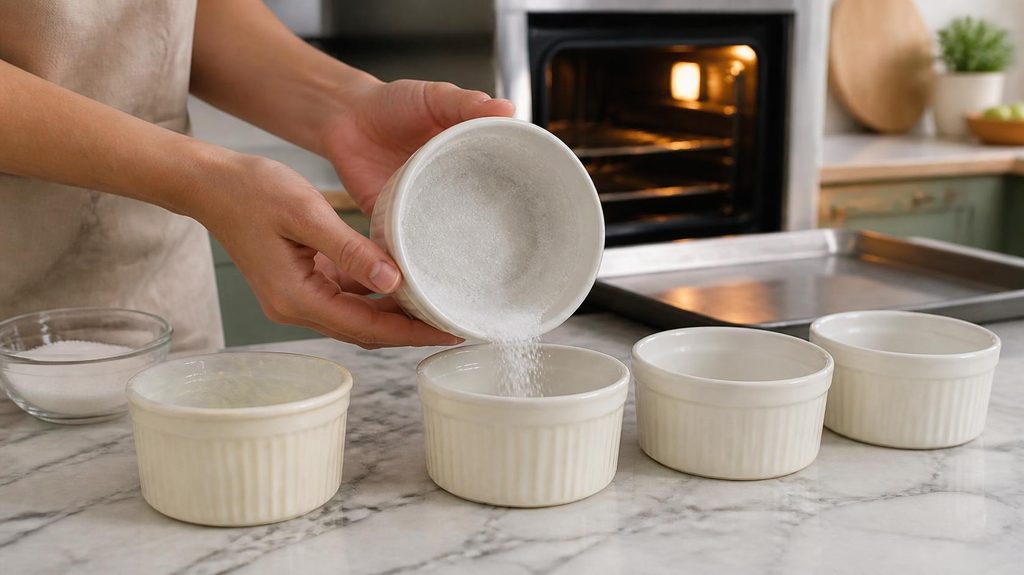
Preheat your oven to 350°F (175°C).
Lightly grease four small ramekins with nonstick spray or butter. Add a spoonful of granulated sugar to one ramekin and rotate it so the sugar coats the bottom and sides. Pour any excess into the next ramekin and repeat.
Place the prepared ramekins on a baking sheet. This makes them easier and safer to move into and out of the oven.
2. Melt the Chocolate and Butter

Fill a small pot with the diced butter and chocolate. Warm the mixture over low heat, stirring gently as the butter melts. Continue until the chocolate is totally melted and smooth.
After taking the saucepan off the burner, allow the mixture to cool somewhat. It should still be fluid but not extremely hot when added to the eggs.
3. Whisk the Eggs, Yolks, and Sugar
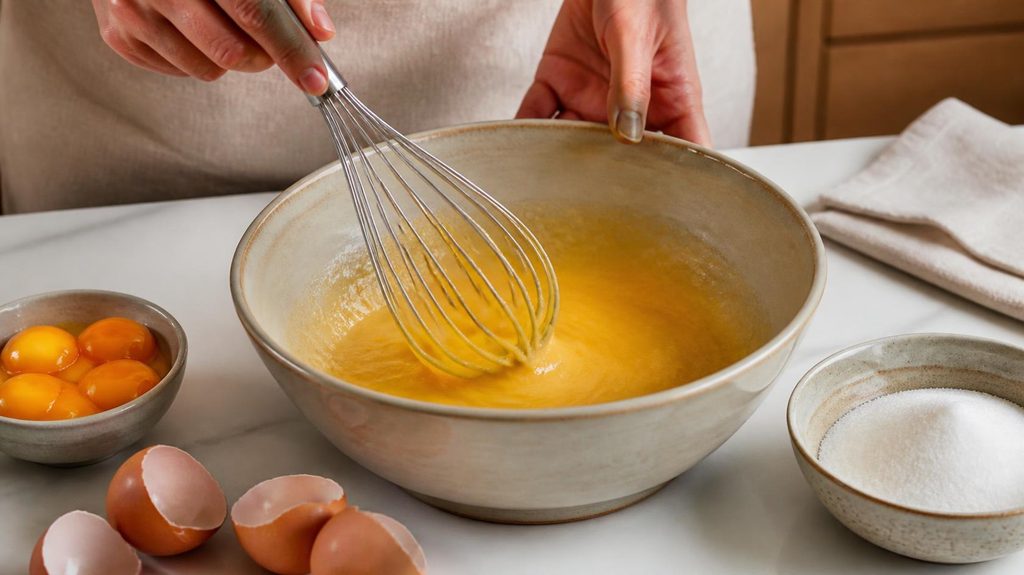
Add the eggs, egg yolks, and granulated sugar to a medium bowl.
Whisk until the mixture becomes slightly thicker and well combined. It does not have to be whipped to a high volume. The goal is simply to blend the eggs and sugar evenly.
4. Combine the Batter

Slowly add the slightly cooled chocolate mixture to the egg mixture while whisking.
Once combined, add the flour and gently mix until no dry streaks remain.
Avoid overmixing once the flour has been incorporated. The batter should be smooth and fairly thick.
5. Fill the Ramekins
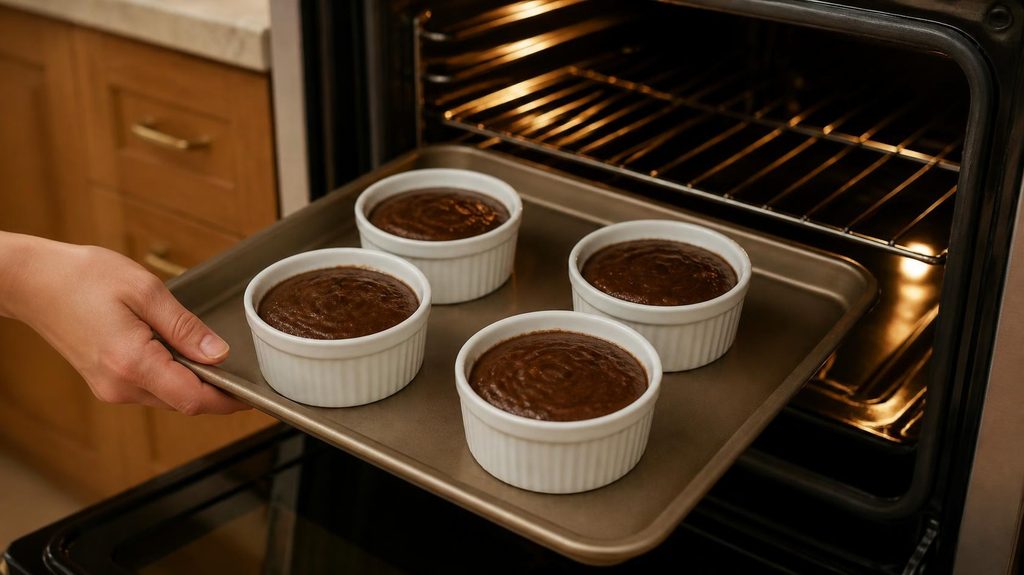
Evenly distribute the batter among the four ramekins that have been prepared. Try to keep the amounts as even as possible so the cakes finish baking at roughly the same time.
Place the ramekins on the baking sheet and carefully transfer them to the preheated oven.
6. Bake Until the Centers Are Jiggly
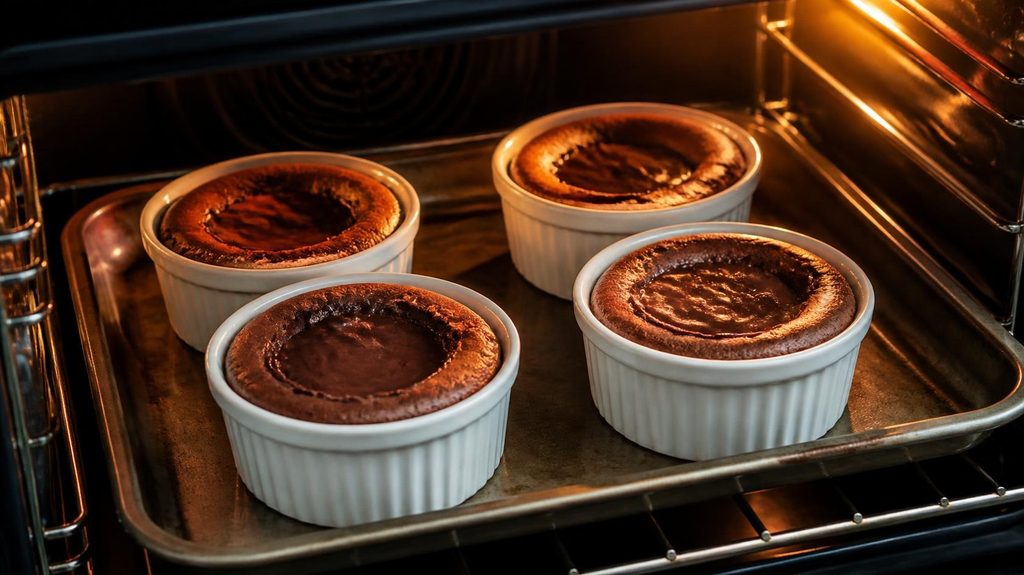
Bake for approximately 11 to 15 minutes.
The exact time can vary depending on your oven, ramekin size, and how molten you want the centers. Look for cakes that have firm-looking edges while the very center still appears soft and slightly jiggly.
Do not wait for the entire surface to look completely firm. That usually means the cakes have been baked too long.
7. Rest and Invert the Cakes

Remove the baking sheet from the oven and let the cakes rest for about 1 minute.
Place a serving plate upside down over a ramekin. Carefully flip the plate and ramekin together, then gently lift the ramekin away.
If the cake does not release immediately, give the ramekin a very gentle shake.
Serve immediately while the center is warm.
Expert Tips
Getting the molten center right is mostly about controlling the baking time.
- Preheat the oven completely. A properly heated oven helps the outside set quickly while the center remains soft.
- Watch the final minutes carefully. Lava cakes can move from perfectly molten to fully baked surprisingly quickly.
- Use room-temperature eggs. They blend more easily with the chocolate mixture.
- Do not overheat the chocolate. Gentle heat is enough to melt the butter and chocolate.
- Let the chocolate cool slightly. Adding very hot chocolate directly to the eggs can affect the mixture.
- Measure flour accurately. Don’t use excess flour;r use accurate measurements.
- Bake all the ramekins together. Keeping the portions similar helps them finish at the same time.
- Use an oven thermometer if needed. Home ovens can sometimes run hotter or cooler than the temperature displayed on the dial.
- Serve immediately. The centers continue to cook from residual heat after the cakes leave the oven.
Recipe Variations
Peanut Butter Chocolate Lava Cakes
Add a small spoonful of creamy peanut butter to the center of each portion before baking. The peanut butter melts into the chocolate for a rich combination.
Salted Caramel Lava Cakes
Add a small amount of thick caramel sauce to the center before baking, then finish the cakes with another drizzle of caramel and a tiny pinch of flaky salt.
Dark Chocolate Lava Cakes
Use high-cocoa dark chocolate for a more intense chocolate flavor. This version is especially good with sweet vanilla ice cream because the contrast keeps the dessert balanced.
Gluten-Free Lava Cakes
Use a gluten-free flour blend instead of regular all-purpose flour. Check your chocolate and other packaged ingredients if you need the entire dessert to be certified gluten-free.
Large Chocolate Lava Cake
You can bake the batter in one larger oven-safe baking dish, but the cooking time will be different. Watch the center carefully rather than relying on the individual-cake timing.
Serving Suggestions
Chocolate Lava Cakes are best served warm, especially when the center is still flowing.
Try pairing them with:
- Vanilla ice cream
- Whipped cream
- Fresh strawberries or raspberries
- Chocolate sauce
- Salted caramel
- Powdered sugar
- Fresh mint
- Chopped toasted nuts
Put the warm cake in the middle of a platter and arrange a tiny scoop of vanilla ice cream next to it for a sophisticated appearance. A few berries and a light dusting of powdered sugar are enough to make it look polished without adding much work.
Storage & Reheating
Chocolate Lava Cakes are best eaten immediately because the molten center is the main attraction.
To make ahead: Fill the prepared ramekins, cover them tightly, and refrigerate. When you are ready to bake, allow the chilled batter to lose some of its refrigerator chill and expect to add extra baking time. Watch the centers rather than following the original time blindly.
For leftovers: A baked lava cake can be refrigerated in an airtight container, but the center will become firmer after chilling.
Reheating: Use the microwave for a very short time. Be careful not to overheat the cake, as the center can become fully set.
For the best texture and presentation, preparing and baking the cakes shortly before serving is recommended.
Common Mistakes to Avoid
- Overbaking the cakes: This is the most common problem. You lose the molten texture if the center is totally solid.
- Using too much flour: Extra flour creates a thicker, more traditional cake texture.
- Adding very hot chocolate to the eggs: Let the melted mixture cool slightly before combining.
- Skipping ramekin preparation: A well-greased and coated ramekin helps the cakes release cleanly.
- Uneven portions: If one ramekin contains significantly more batter, the cakes will not finish at the same time.
- Opening the oven repeatedly: Frequent temperature changes can affect baking.
- Waiting too long to serve: The center continues to thicken as the cake cools.
Frequently Asked Questions
How do I know when Chocolate Lava Cakes are done?
The edges should look set while the center remains soft and slightly jiggly. The middle should not look completely firm.
Can I use milk chocolate?
Yes. Milk chocolate can be used, but it will produce a sweeter and milder cake. Semi-sweet or dark chocolate gives a more balanced chocolate flavor.
Can I make Chocolate Lava Cakes without flour?
Yes. Flour can be omitted for a flour-free version, although the texture will be slightly different and more delicate.
Can I prepare lava cake batter ahead of time?
Yes. You can portion the batter into the ramekins, cover them, and refrigerate them before baking. Chilled batter generally needs additional baking time.
Why did my lava cake not have a molten center?
The most common reason is overbaking. Oven temperature, ramekin size, and batter temperature can all affect the result, so start checking the cakes near the lower end of the recommended baking time.
Can I bake lava cakes in a muffin pan?
Yes. A muffin pan can work when you do not have ramekins. The smaller portions can bake faster, so monitor them closely.
What chocolate is best for lava cakes?
Semi-sweet or dark chocolate works particularly well. Choose a chocolate you enjoy eating because its flavor will be noticeable in the finished dessert.
Can I freeze Chocolate Lava Cakes?
The cakes can be frozen after baking, although the texture of the center may change. For the best molten texture, freshly baked cakes are preferable.
Nutrition Information (Approximate)
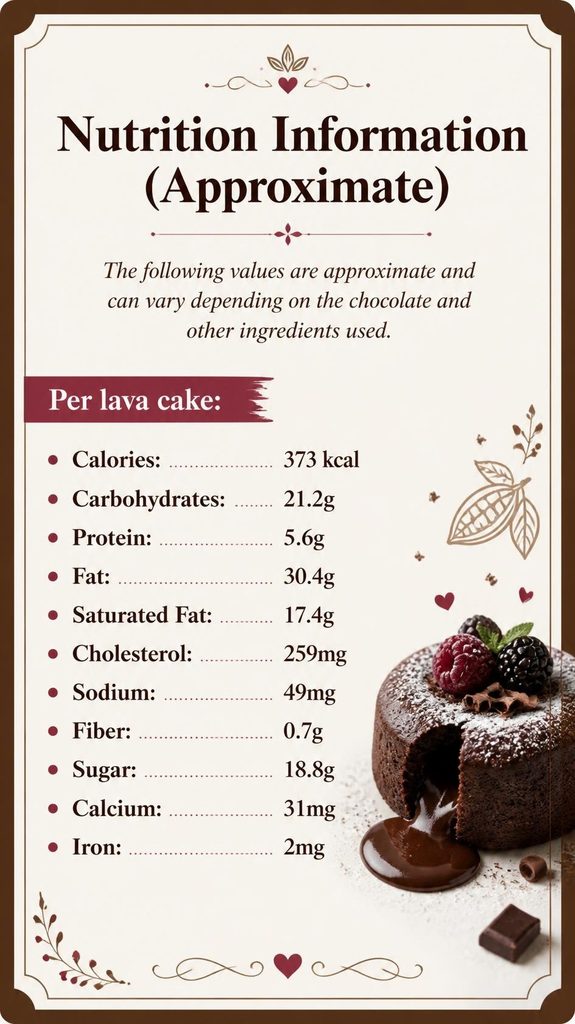
The following values are approximate and can vary depending on the chocolate and other ingredients used.
Per lava cake:
- Calories: 373 kcal
- Carbohydrates: 21.2g
- Protein: 5.6g
- Fat: 30.4g
- Saturated Fat: 17.4g
- Cholesterol: 259mg
- Sodium: 49mg
- Fiber: 0.7g
- Sugar: 18.8g
- Calcium: 31mg
- Iron: 2mg
Adding ice cream, caramel, chocolate sauce, or other toppings will increase the nutritional values.
Recipe Card (Printable Summary)
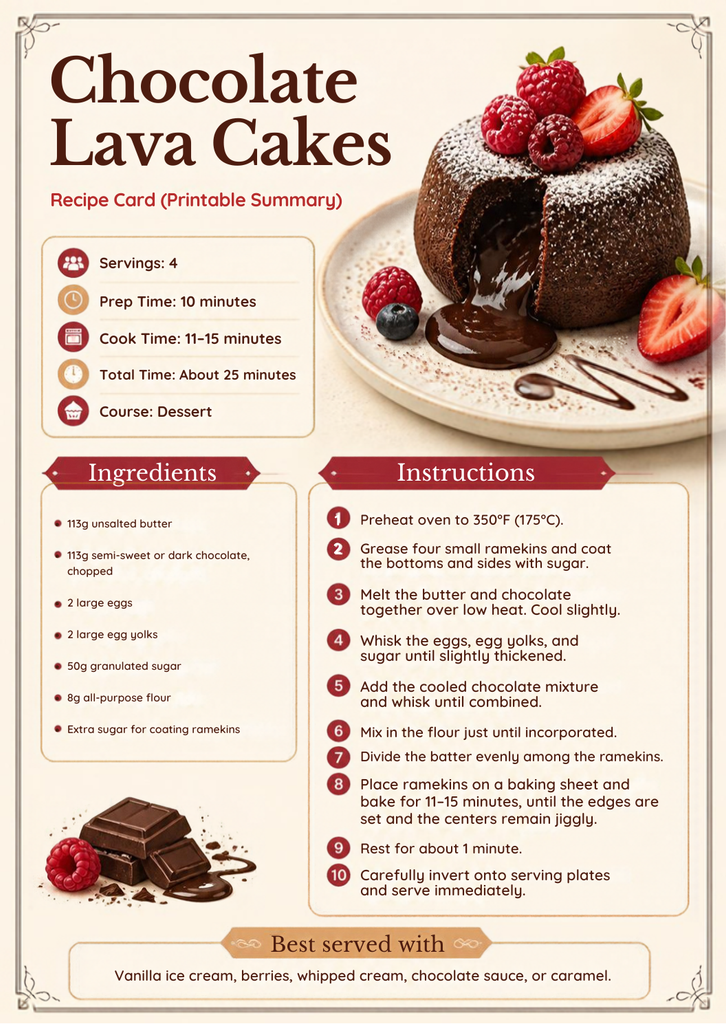
Chocolate Lava Cakes
Servings: 4
Prep Time: 10 minutes
Cook Time: 11–15 minutes
Total Time: About 25 minutes
Course: Dessert
Ingredients
- 113g unsalted butter
- 113g semi-sweet or dark chocolate, chopped
- 2 large eggs
- 2 large egg yolks
- 50g granulated sugar
- 8g all-purpose flour
- Extra sugar for coating ramekins
Instructions
- Preheat oven to 350°F (175°C).
- Grease four small ramekins and coat the bottoms and sides with sugar.
- Melt the butter and chocolate together over low heat. Cool slightly.
- Whisk the eggs, egg yolks, and sugar until slightly thickened.
- Add the cooled chocolate mixture and whisk until combined.
- Mix in the flour just until incorporated.
- Divide the batter evenly among the ramekins.
- Place ramekins on a baking sheet and bake for 11–15 minutes, until the edges are set and the centers remain jiggly.
- Rest for about 1 minute.
- Carefully invert onto serving plates and serve immediately.
Best served with: Vanilla ice cream, berries, whipped cream, chocolate sauce, or caramel.
Conclusion
These Chocolate Lava Cakes are proof that an impressive dessert does not have to be complicated. With a few basic ingredients and careful attention to baking time, you can create soft individual cakes with a warm, molten chocolate center in about 25 minutes.
The key is simple: do not overbake them. Once the edges are set and the center still has a gentle jiggle, take them out and serve them warm. Add a scoop of vanilla ice cream or a handful of fresh berries, and you have an easy dessert that feels far more special than the effort required.

Chocolate Dessert Recipes: Rich And Delicious

Quick Recipe: Easy 5-Minute Avocado Egg Toast

Italian Chicken Recipes: Easy, Creamy And Delicious

What Are Chicken Enchiladas? Easy Guide to This Mexican Favorite

Healthy Diet Meal: Easy High-Protein Chicken Recipe for Weight Loss

The Best Homemade BBQ Chicken Pizza Recipe 2026

Simple Fried Chicken Recipe: Crispy, Juicy, and Easy

Healthy Chicken Soup Recipe With Vegetables and Tender Chicken

Homemade Cream of Chicken Soup Recipe 2026

Classic Chicken Salad Recipe – Creamy, Flavorful And Delicious
-
 Baked Chicken3 weeks ago
The Best Homemade BBQ Chicken Pizza Recipe 2026
-
 Chicken Recipes3 weeks ago
Simple Fried Chicken Recipe: Crispy, Juicy, and Easy
-
 Soups and Salad3 weeks ago
Healthy Chicken Soup Recipe With Vegetables and Tender Chicken
-
 Soups and Salad2 weeks ago
Homemade Cream of Chicken Soup Recipe 2026
-
 Soups and Salad3 weeks ago
Classic Chicken Salad Recipe – Creamy, Flavorful And Delicious
-

 Chicken Recipes3 weeks ago
Chicken Biryani Recipe: Flavorful and Easy to Make
-
 Fried Chicken3 weeks ago
Gluten-Free Chicken Nuggets Crispy And Homemade
-
 Milkshakes2 weeks ago
Salted Caramel Milkshake Creamy And Easy Recipe